
MineBrush publication
Minecraft Skin Colours: Build a Palette and Recolour Your Outfit
Choose Your Skin Colours — Give your Minecraft character a clear style. Build a small palette, try ready-to-copy outfit colours and recolour a skin without losing its shading.
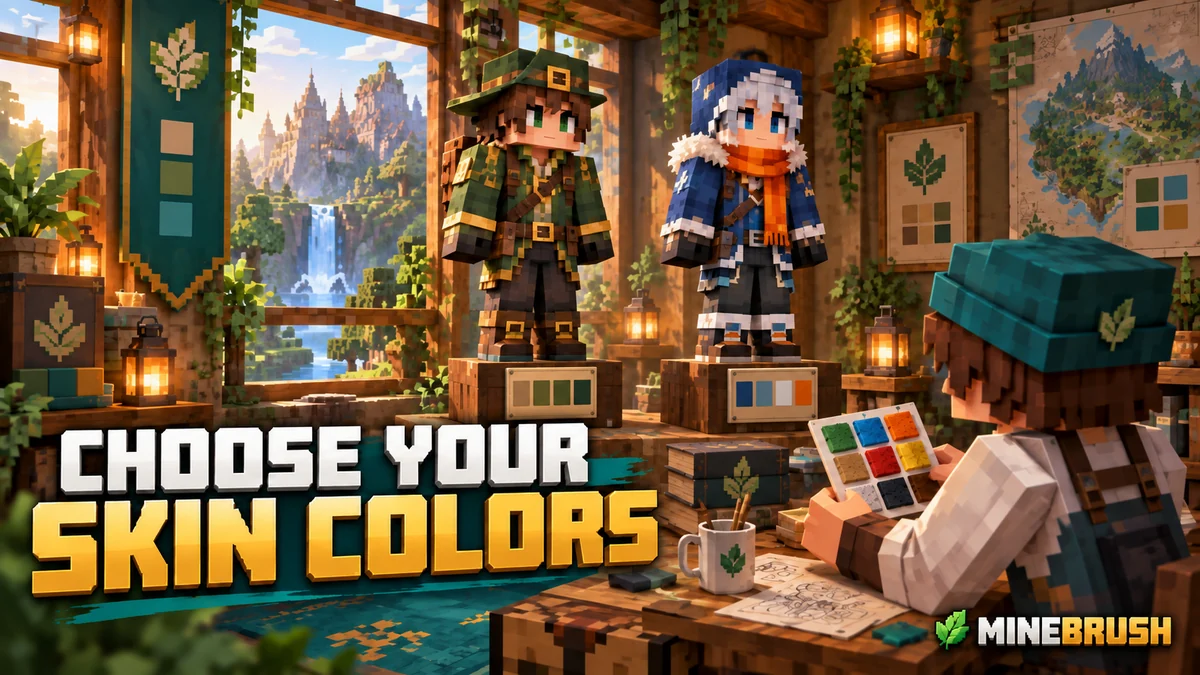
Want your Minecraft skin to look like a character rather than a collection of coloured pixels? Start with a few colours that work together, make the important shapes easy to see, then add shadows and highlights. You can use the same approach to design a new outfit, recolour a favourite skin or give your group matching colours without making everyone identical.
This guide includes a small outfit palette you can try, an explanation of the colour controls, and real examples from skin creators. You can work in a browser editor such as PMCSkin3D. If you are starting from an empty texture, our first-skin guide covers the model and painting workflow.
Give your colours a simple purpose
Choose the character’s main idea before opening the colour wheel: a forest explorer, a winter courier, a space mechanic or a character wearing your everyday clothes. Pick the main garment colour, a quieter supporting colour and one small accent. Skin and hair can have their own shades; they do not have to match the outfit palette exactly.
- Main colour: the jacket, robe or other large area that gives the outfit its identity.
- Supporting colour: trousers, boots, straps or sleeves that let the main garment stand out.
- Accent: a scarf, visor, emblem or trim that gives the eye somewhere to stop.
A blue coat with dark trousers and an orange scarf is easy to recognise. The same orange spread across every edge, shoe and sleeve can make the outfit feel busy. Try a small accent first, then add more only where it helps.
Understand the three controls you will use
Hue changes the colour family, such as green toward blue. Saturation changes how vivid or muted it looks. Lightness changes its position between dark and light. These controls are often grouped under HSL. Moving one is a useful way to explore options; it is not a rule that every skin needs highly saturated colours.
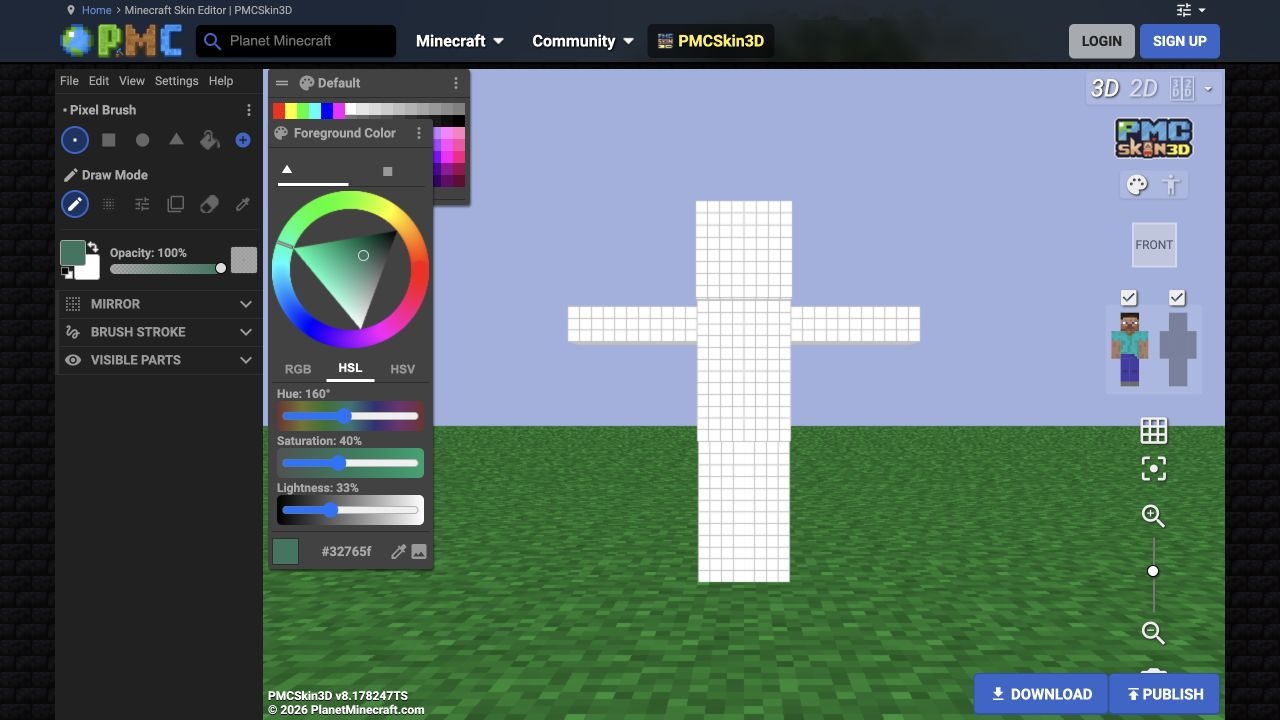
In PMCSkin3D, use the drawing mode marked with a palette icon and the Foreground Color panel. Its HSL tab exposes these controls. You can also click the colour code below the wheel and enter a value such as #32765F. This code simply lets you reuse the same colour accurately.
Try this forest-explorer outfit palette
The colours below are an original MineBrush starting point. Use them for the clothes on your own design; choose skin and hair colours separately. Each row moves from shadow through the main colour to a highlight. You can copy a code into the editor, or adjust it until the outfit feels right to you.
| Shadow | Main colour | Highlight |
|---|---|---|
| Jacket | ||
■#1C4148 |
■#32765F |
■#81A979 |
| Boots and straps | ||
■#2B2533 |
■#665047 |
■#A88365 |
| Scarf or trim | ||
■#AD4B33 |
■#D8773B |
■#F1B45F |
Paint most of the jacket in the middle green. Use the darker shade where a fold or edge needs depth, then add a few lighter areas where the form catches light. Put the orange on one recognisable feature, such as the scarf. Check the whole model before adding tiny trim everywhere.
For a winter variation, keep the same arrangement but choose a blue jacket with a warmer scarf. For a team outfit, keep the main clothing consistent and change one accessory per player. For a casual skin, borrow the broad colours of clothes you already like wearing.
Make the face, hair and clothing easy to tell apart
Colour differences are not only about hue. Two different colours can look similarly dark and merge at a distance. If dark hair disappears into a dark hood, try a slightly lighter hood edge or a clearer shape around the face. If pale hair merges into a pale face, strengthen their boundary with a darker strand or a shadow where they meet.
Zoom out until the character is about the size you expect to see during play. Can you still identify the face, jacket and main accessory? If you need to zoom all the way in to explain the design, simplify a busy patch or make the important areas more distinct.
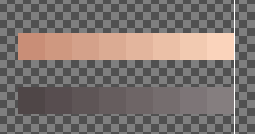
A temporary grayscale preview can help you notice colours that blend together in brightness. Use it as a quick comparison, not a demand for harsh contrast on every pixel. Check the coloured skin again before deciding, and keep the original coloured file.
Add shading without covering the skin in noise
Start with a base colour, one darker shade and one lighter shade for a material. Add intermediate colours only when you can see what they improve. A few connected shapes usually describe a sleeve or lock of hair more clearly than scattered light and dark dots.
Keep your imagined light direction consistent. You might make upper-facing areas lighter and undersides darker, then adapt the pattern around folds and body parts. The painted shading is part of the texture: it does not automatically move when you turn toward the sun.
Hue shifting within a shadow-to-highlight palette can add character. For example, the green jacket above has a cooler, bluish shadow and a warmer highlight. This is an artistic choice, not a requirement to move every shadow toward one particular colour. Black clothing can still use several dark shades; white clothing can use light tinted shadows so folds remain visible.
Recolour an existing skin without losing its details
Work on a copy. Pick the material you want to change, identify its shades from darkest to lightest, and make a replacement set in the same order. Replace each shade with its counterpart instead of filling the whole material with one colour.
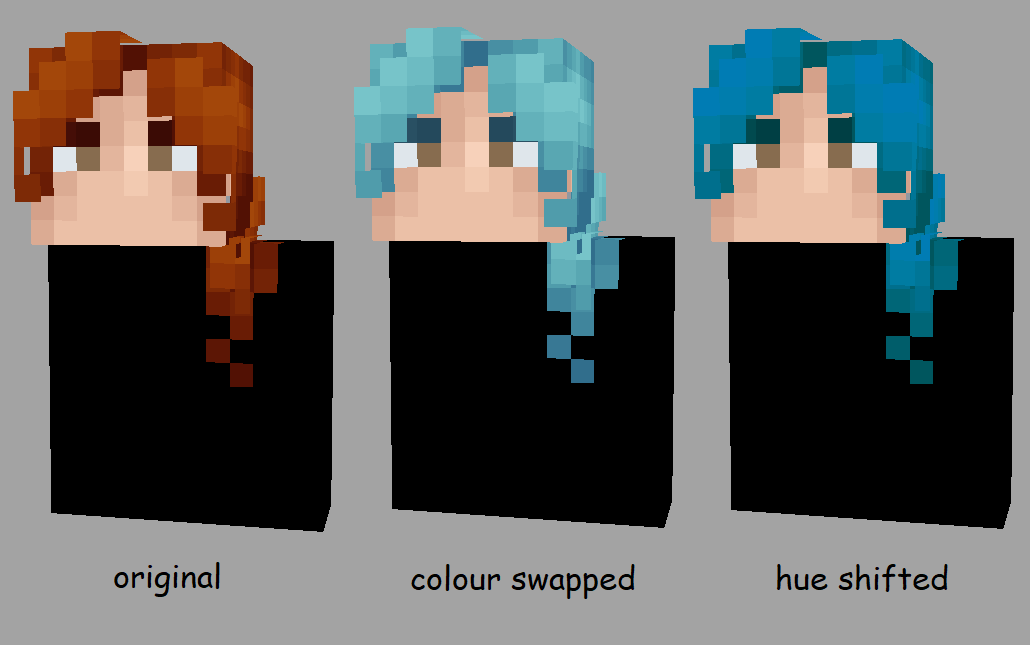
If hair, boots and clothing share a colour, a global replacement may change all of them. Limit your selection to the intended area and inspect the other body parts afterward. A broad hue adjustment is fast, but compare the result before keeping it.
Useful habits while painting
- Reuse a colour with the picker: sample an existing patch instead of guessing a slightly different shade each time.
- Keep a small palette: save the colours you use for a garment so its front, back and sleeves stay consistent.
- Check every side: the front of a jacket can look finished while the inner arms or back still have an old colour.
- Check the outer layer: hair, a hood or jacket details may sit there. Recolouring only the base layer can leave an unexpected border.
- Save useful variations separately: keep the original and the new outfit instead of relying on a long undo history.
Use the model view to judge the character, and the flat texture when you need to find a hidden area. If a colour appears in the wrong place, check the body part and layer before repainting more of the skin.
Fix the most common colour problems
- The outfit looks muddy: reduce the number of nearly identical shades and strengthen one important boundary, such as hair against hood.
- Everything looks neon: mute the supporting colours and reserve stronger saturation for the feature you want noticed.
- The accent disappears: group it into a clearer shape or change its brightness relative to the material behind it.
- Shadows look dirty: move them to places that explain the form; avoid outlining every single edge with the darkest colour.
- The recolour looks flat: restore differences between shadow, base and highlight rather than adding random new detail.
- Black or white areas have no shape: leave room for slightly lighter or darker shades instead of using one extreme everywhere.
Finish with a real-sized preview
Rotate the skin, zoom out and compare it against both a light and a dark background. Look for the face, the overall outfit and the accessory you want people to recognise. If you want team members to be distinguishable, vary an emblem or shape as well as colour.
Save the actual skin as PNG and keep its intended Classic or Slim model. A 3D screenshot is a preview, not the texture you install. Our skin-preview guide shows how to inspect layers, poses and the final appearance in Minecraft.
You are finished when the character reads clearly and the colours support the idea you wanted. More shades and more detail are optional; they should make the skin more enjoyable to look at.
Sources and image credits
Outfit examples and the forest palette are original MineBrush guidance. Current colour controls and palette tools: PMCSkin3D’s editor and official help. Recolour examples: candlemouse, How to Colour Swap Skins, October 2024. Further creator perspectives: Sushifox’s skin-design overview, Jyuunen’s shading and hue-shifting tutorial, and SouthDakotaGirl / Shady Skinners on colour and shading. For models and applying skins, see Mojang’s skin guide. The MineBrush cover is an editorial illustration, not a downloadable skin.
More from MineBrush.
Make Your Own Minecraft Skin — Create a Classic or Slim character, paint an outfit, add readable shading and outer-layer details, then export your PNG and wear it in Java or Bedrock on Windows and mobile.
- Edition
- Cross-edition
- Difficulty
- Beginner
- Time
- Work at your own pace
Classic or Slim; Bedrock custom imports on Windows and mobile
MineBrush · Guide
Make Your Own Minecraft Skin
Make Your Own Minecraft Skin — Create a Classic or Slim character, paint an outfit, add readable shading and outer-layer details, then export your PNG and wear it in Java or Bedrock on Windows and mobile.
Classic or Slim; Bedrock custom imports on Windows and mobile
- Minecraft version
- 64×64 skins · Java and Bedrock Windows/mobile
- Game edition
- Cross-edition
- Platform family
- Cross-edition
- Supported devices
- Java on PC/Mac/Linux; Bedrock on Windows, Android and iOS
- Install format
- Create and export your own 64×64 PNG
- Touch readiness
- Check guide
- Resource type
- Guide
- Compatibility confidence
- Source claimed
- Card evidence statement
- Real editor captures and creator shading examples
- Card delivery statement
- Choose a model, paint an outfit and export PNG
- Card limitation note
- Classic or Slim; Bedrock custom imports on Windows and mobile
- Edition applicability
- Java + Bedrock
- Estimated time
- Work at your own pace
- Guide difficulty
- Beginner
- Delivery state
- No file
- Lifecycle state
- Current
Check Your Minecraft Skin — Find wrong arm models, unfinished sides and missing outer-layer details. Preview poses, check the skin in Minecraft and make clear images before sharing it.
- Edition
- Cross-edition
- Difficulty
- Beginner
- Time
- A short check
Fix visible problems before wearing or sharing your skin
MineBrush · Guide
Check Your Minecraft Skin
Check Your Minecraft Skin — Find wrong arm models, unfinished sides and missing outer-layer details. Preview poses, check the skin in Minecraft and make clear images before sharing it.
Fix visible problems before wearing or sharing your skin
- Minecraft version
- 64×64 skins · Classic and Slim
- Game edition
- Cross-edition
- Platform family
- Cross-edition
- Supported devices
- Java PC/Mac/Linux; Bedrock Windows, Android and iOS imports
- Install format
- Preview your own skin PNG in a browser and Minecraft
- Touch readiness
- Check guide
- Resource type
- Guide
- Compatibility confidence
- Source claimed
- Card evidence statement
- Actual editor capture and credited interface examples
- Card delivery statement
- Model, layers, poses and in-game appearance
- Card limitation note
- Fix visible problems before wearing or sharing your skin
- Edition applicability
- Java + Bedrock
- Estimated time
- A short check
- Guide difficulty
- Beginner
- Delivery state
- Direct download
- Lifecycle state
- Current
3D Skin Layers
1.11.2Give your skin’s hat, hair and clothing edges real depth with 3D Skin Layers. Download Fabric for Java 26.2 or NeoForge for 26.1.2, see the author’s example and learn how to fix missing layers or armor overlap.
- Minecraft
- Java 26.2 (Fabric); 26.1.2 (NeoForge)
- Loader
- Fabric
- Runtime
- Client
No NeoForge 26.2 release yet; client only.
Java · Mod
3D Skin Layers
Give your skin’s hat, hair and clothing edges real depth with 3D Skin Layers. Download Fabric for Java 26.2 or NeoForge for 26.1.2, see the author’s example and learn how to fix missing layers or armor overlap.
No NeoForge 26.2 release yet; client only.
- Minecraft version
- Java 26.2 (Fabric); 26.1.2 (NeoForge)
- Game edition
- Java Edition
- Loader / platform
- Fabric
- License
- tr7zw Protective License
- Platform family
- Java & PC
- Supported devices
- Windows · macOS · Linux
- Install format
- Place the matching JAR in the game instance’s mods folder
- Touch readiness
- Not required
- Resource type
- Mod
- Project version
- 1.11.2
- Last verified at
- Sep 5, 2026
- Secondary guide action
- Setup & fixes
- Compatibility confidence
- Source claimed
- Java mod loader
- Fabric
- Java runtime side
- Client
- Card evidence statement
- Give the outer layer of your existing skin more depth.
- Required dependency
- Fabric API for Fabric; no separate library for NeoForge
- Card delivery statement
- Fabric 26.2 and NeoForge 26.1.2 downloads on MineBrush
- Card limitation note
- No NeoForge 26.2 release yet; client only.
- Edition applicability
- Java
- Delivery state
- Direct download
- Lifecycle state
- Current
Player discussion 0
Questions, discoveries and help from other players.