
MineBrush publication
How to Make a Minecraft Skin: Classic, Slim and Your First Design
Make Your Own Minecraft Skin — Create a Classic or Slim character, paint an outfit, add readable shading and outer-layer details, then export your PNG and wear it in Java or Bedrock on Windows and mobile.
Make a Minecraft skin that looks like your character, from the first colour to the finished PNG. This beginner guide uses PMCSkin3D, a free browser editor with a rotatable model. You will choose Classic or Slim arms, build an outfit, add depth without covering it in noise, and put the result into Minecraft.
The goal is a standard 64×64 player skin for Java or Bedrock on Windows and mobile. You do not need a mod, shader, paid editor or downloaded template: the editor creates a blank player model for you. Console Bedrock does not offer the same custom-PNG import route.
Pick a character you will enjoy playing
Start with one role and one recognisable detail. A forest explorer could wear an olive jacket and a turquoise scarf; a redstone engineer could have navy overalls and an orange sleeve; friends on a server can share a jacket colour while keeping different faces, hair and badges. A winter version can reuse your face and change the coat and boots.
For your first design, try the forest explorer: cream shirt, olive jacket, brown trousers and boots, turquoise scarf, plus your chosen hair and skin colours. Finish those large areas before adding pockets or buttons. The colours are a starting idea, not a rule: the useful part is a clear outfit with one accent you can still recognise when zoomed out.
1. Create the right player model
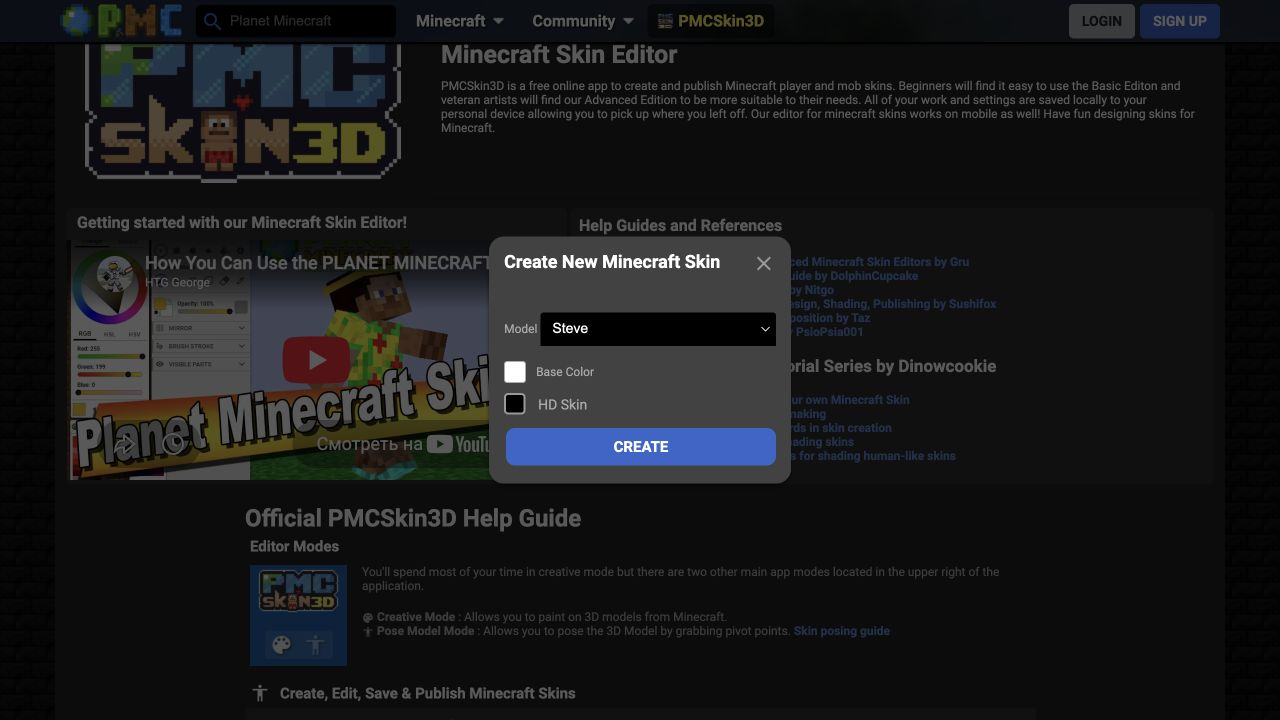
- Open PMCSkin3D. Choose its Basic editor if offered.
- Open File → New skin. Choose Steve for Classic/Wide arms or Alex (3 pixel arms) for Slim. Pick the ordinary player model, not a mob or cape.
- Leave HD Skin off for this 64×64 workflow. Choose a base colour and press Create.
Classic arms are four pixels wide; Slim arms are three. Both can wear the same kind of outfit, but the arm textures wrap differently. Classic gives a little more space for sleeve details; Slim gives a narrower silhouette. Choose whichever you prefer now, and use the same model when importing the finished PNG.
2. Paint the base outfit before tiny details
Use the pencil for individual pixels and the paint bucket for larger areas. Click the foreground colour to choose a colour; the eyedropper lets you pick a colour already on your skin. Keep the pencil small and fully opaque for clean edges. A soft brush or heavy spray effect makes a small face much harder to read.
- Head: block in skin and hair. Place the eyes, then zoom out before adding eyebrows, a mouth or a fringe. One misplaced pixel can change the whole expression.
- Torso: paint the shirt, then the jacket sides, leaving a strip of shirt visible at the front. Continue the jacket around the back.
- Arms: add sleeves and hands. Match cuff height on both arms before making one sleeve different.
- Legs: fill trousers and boots. Continue the boot height around the sides and back; paint the soles as well.
Rotate the model as you work. The 3D view makes wrapping easy to understand; the 2D view is useful for spotting untouched faces. Hide an arm or another body part when it blocks a surface you need to paint. A good base should already look complete with the outer layer hidden.
3. Add simple shading that explains the outfit
Begin with three versions of an important colour: the main colour, a darker shade and a small highlight. On the explorer jacket, try a darker line beneath the collar and cuffs, then a short lighter strip on the upper shoulder. Keep the broad jacket panels readable. You do not need a different shade on every pixel.
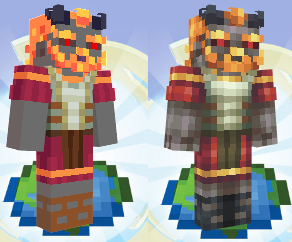
Think about what overlaps what. A sleeve edge can be lighter while the arm immediately under it is darker; that small contrast can make the sleeve feel raised. Keep painted shadows fairly restrained for a first skin, because the game also lights the character as it moves.
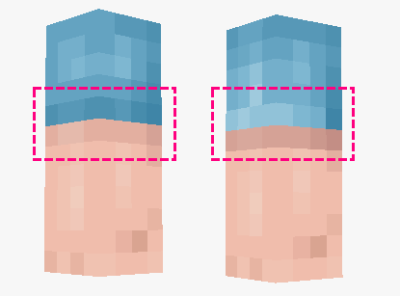
Check the skin at a normal viewing size. If the scarf disappears into the jacket, make their lightness more different. If the outfit looks speckled, replace scattered single pixels with a few larger patches. Keep the strongest contrast around the face and your signature detail.
4. Use the outer layer for hair, cuffs and accessories
The outer layer sits slightly above the base skin. Use the editor’s body/overlay visibility controls to work on the hat, jacket, sleeves or trousers separately. Add a fringe, raised jacket collar or cuff only where it helps the design; leave the unused outer areas transparent.
For the explorer, keep the shirt and jacket colours on the base, then add a short scarf edge or collar on the outer torso layer. For a winter variant, a hat rim and coat cuffs work well. For a team outfit, a small shoulder accent can distinguish players without redrawing every face.
A skin can suggest glasses, a backpack or armour with pixels and outer-layer details, but it does not create a new wearable item, grant protection or unlock a cape. For actual gear, you still use the game’s items.
5. Check the places you rarely see from the front
Rotate through front, back, both sides, top and bottom. Look beneath the arms, between the legs, under the head and at the soles. Connect the jacket hem and sleeve cuffs across adjacent faces. Keep skin-coloured hands separate from sleeves, and look for accidental empty patches on the base layer.
Switch the outer layer off and on: the base should be complete, and the extra detail should improve it. If your editor supports posing, spread the arms and legs for another look at hidden edges. Use the separate left and right limb surfaces for an asymmetric glove or knee patch rather than assuming both limbs must match.
6. Save a real skin PNG
Choose File → Save to file and save the exported PNG somewhere you can find it. A name such as forest-explorer-slim.png helps you remember the model. Keep a second copy before trying a new outfit or changing arm models.
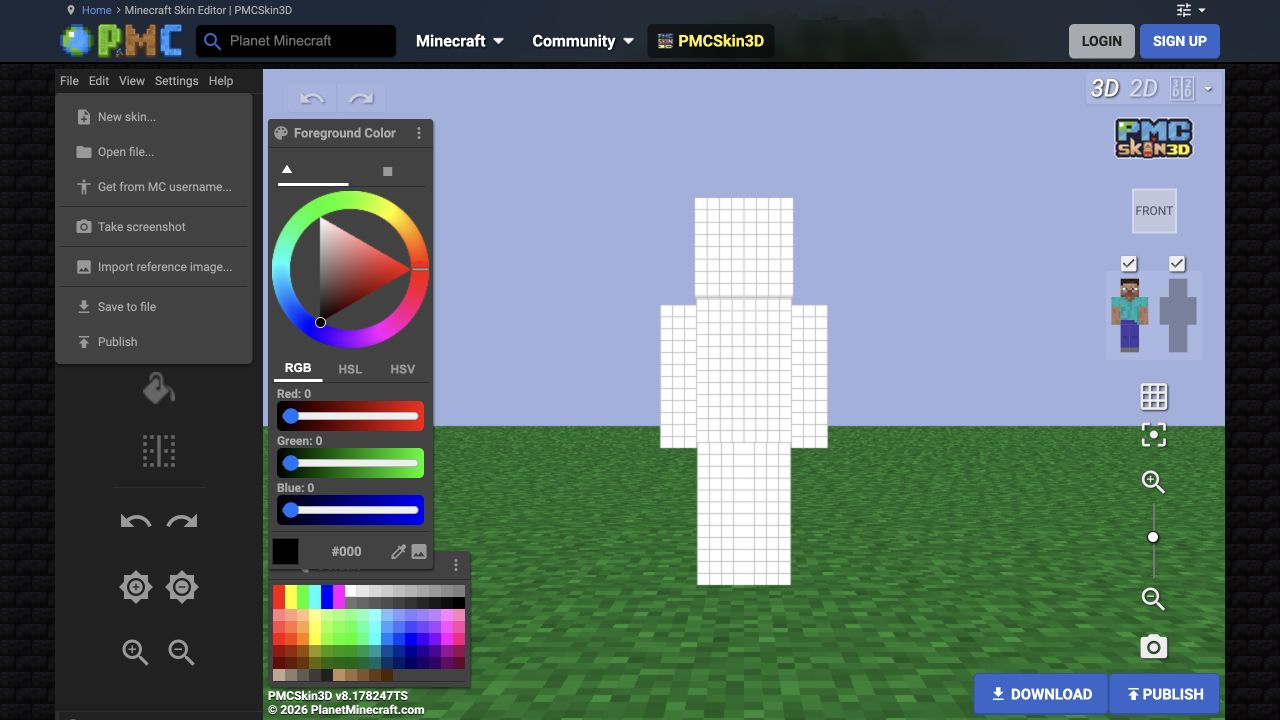
The exported skin is a flat arrangement of body parts. That is normal. Keep it at 64×64 PNG: do not enlarge it for sharper detail, convert it to JPEG, or upload a screenshot of the 3D character. A picture editor should use hard-edged pixel tools, without smoothing the texture. PMCSkin3D saves work locally in the browser, but an exported PNG is the copy you can keep, transfer and reopen with File → Open file.
7. Wear your skin in Minecraft
Java Edition
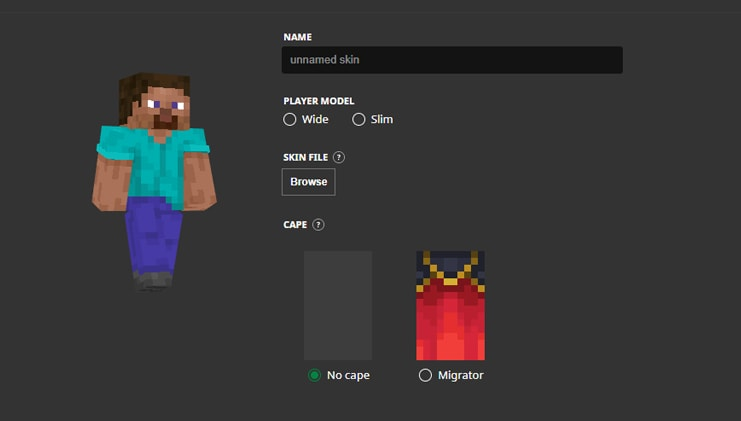
In the Minecraft Launcher, choose Java Edition → Skins → New Skin. Name the skin, select the matching Wide/Classic or Slim model, browse to your PNG and choose Save and Use. These steps follow Mojang’s official skin guide.
Bedrock on Windows, Android and iPhone/iPad
Open Dressing Room, choose a character slot and go to Classic Skins. Find the owned/import option, choose your PNG from the device and select the matching arm shape. Menu wording can vary by device. Use the classic-skin import route rather than building a character from individual Character Creator items.
Mojang’s Character Creator FAQ confirms custom imports on Windows and mobile, but not consoles. Imported Bedrock skins do not automatically sync between devices, so keep your PNG and import it on each supported device where you play.
If the result does not look right
- Odd arm edges or missing sleeve pixels: check that the editor and Minecraft both use Classic or both use Slim. Changing the model can require repainting the arm edges.
- The file is rejected: confirm that you selected the exported 64×64 PNG texture, not a preview picture, JPEG or enlarged image. Reopen it in the editor and export again.
- The hat or jacket detail disappeared: check overlay visibility in the editor and the game’s skin-customisation options. Make sure you actually painted the outer layer, not only the base.
- A line appears only when walking: inspect the inner legs, underarms and adjoining side faces. A front-only preview can hide an unpainted strip.
- Your old look remains: check the selected skin, correct account and character slot, then restart or rejoin. A server that replaces player appearances may override your choice.
Once the first skin works, make a useful variant: warmer travel clothes, a builder’s apron, a shared server uniform or a different season’s colours. Keep the face and one recognisable accent so each version still feels like your character.
Sources and creators
This guide and the explorer design exercise are written by MineBrush. PMCSkin3D and its built-in help are by Planet Minecraft. The shading illustrations are by DinowCookie; the launcher illustration and installation guidance are from Mojang. For another beginner walkthrough, see DolphinCupcake’s PMCSkin3D guide. The MineBrush cover is an original editorial illustration; the in-article images are real editor captures or credited creator examples.
More from MineBrush.
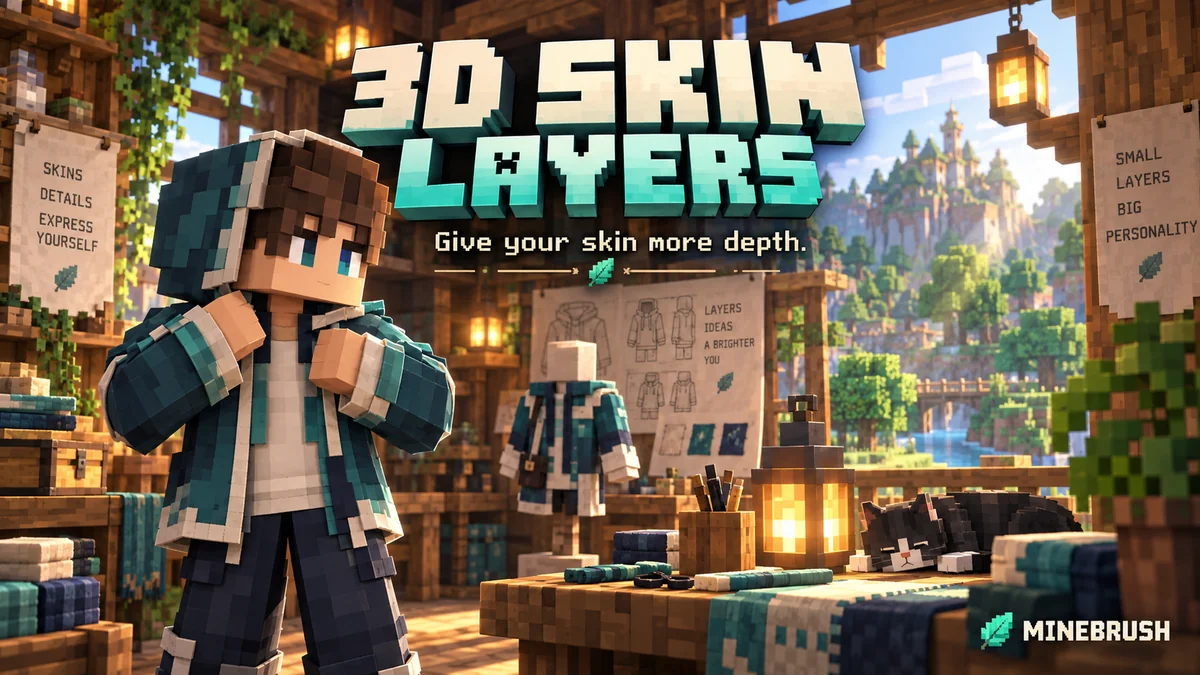
3D Skin Layers
1.11.2Give your skin’s hat, hair and clothing edges real depth with 3D Skin Layers. Download Fabric for Java 26.2 or NeoForge for 26.1.2, see the author’s example and learn how to fix missing layers or armor overlap.
- Minecraft
- Java 26.2 (Fabric); 26.1.2 (NeoForge)
- Loader
- Fabric
- Runtime
- Client
No NeoForge 26.2 release yet; client only.
Java · Mod
3D Skin Layers
Give your skin’s hat, hair and clothing edges real depth with 3D Skin Layers. Download Fabric for Java 26.2 or NeoForge for 26.1.2, see the author’s example and learn how to fix missing layers or armor overlap.
No NeoForge 26.2 release yet; client only.
- Minecraft version
- Java 26.2 (Fabric); 26.1.2 (NeoForge)
- Game edition
- Java Edition
- Loader / platform
- Fabric
- License
- tr7zw Protective License
- Platform family
- Java & PC
- Supported devices
- Windows · macOS · Linux
- Install format
- Place the matching JAR in the game instance’s mods folder
- Touch readiness
- Not required
- Resource type
- Mod
- Project version
- 1.11.2
- Last verified at
- Sep 5, 2026
- Secondary guide action
- Setup & fixes
- Compatibility confidence
- Source claimed
- Java mod loader
- Fabric
- Java runtime side
- Client
- Card evidence statement
- Give the outer layer of your existing skin more depth.
- Required dependency
- Fabric API for Fabric; no separate library for NeoForge
- Card delivery statement
- Fabric 26.2 and NeoForge 26.1.2 downloads on MineBrush
- Card limitation note
- No NeoForge 26.2 release yet; client only.
- Edition applicability
- Java
- Delivery state
- Direct download
- Lifecycle state
- Current
Player discussion 0
Questions, discoveries and help from other players.