
MineBrush publication
How to Record Minecraft Videos: Build Tours, Mod Demos and Clear Sound
Show Your Minecraft World — Plan a house tour, mod demonstration or gameplay clip. Choose useful shots, record on PC or mobile, check sound and fix common capture problems before sharing.
Show people what makes your Minecraft world worth watching. A clear house tour, a useful mod demonstration or a short adventure clip starts with a simple plan: what the viewer should see, where you will stand and what happens next. You can begin with your usual game and a screen recorder; a cinematic camera mod is optional.
Pick a video that answers one question
- “What did you build?” Show the finished exterior, the entrance, one useful room and your favourite detail. A viewer should understand the layout, not just see a spinning camera.
- “What does this mod do?” Show the action that makes it useful: use the tool, open the menu or demonstrate the changed behaviour. Include the Minecraft version and loader in your description.
- “How can I do that?” Start with the result, show the materials or settings, then demonstrate the important steps slowly enough to follow.
- “What changed?” For a build renovation or visual-pack comparison, keep the camera position and framing similar so the difference is easy to see.
- “What happened on our adventure?” Give the moment context, show the event, then hold on the result. Friends should not need five minutes of walking to understand the clip.
A ready-to-use plan for a short house tour
Try this as a starting point, then adjust the timings to your build:
- Opening, about 5 seconds: stand far enough back to show the whole house and its surroundings. Hold the view still.
- Approach, about 8 seconds: follow the path to the door with a slow, deliberate movement.
- Interior, about 10 seconds: show the main room and one practical feature, such as storage or a staircase. Avoid rushing through every room.
- Detail, about 5 seconds: pause on the roof trim, garden, fireplace or redstone feature you are proud of.
- Closing, about 5 seconds: return to a clear overview or a favourite angle. Leave room for a short caption with the build's name.
Record these as separate clips if one continuous tour feels awkward. Leave a little stillness before and after each movement so you can make clean cuts later.
Make the build readable before making it dramatic
Choose an angle that shows both the front and a side of your build. Include enough ground to explain where the entrance is, and avoid cutting off the roof. If the background competes with the subject, try moving a few blocks sideways before changing any settings.
Bright daylight is useful for explaining materials and layout. A sunset or night shot can show lighting and atmosphere, but check that doors, paths and room details remain visible. Use a second, brighter shot if the moodier view hides something viewers need to understand.
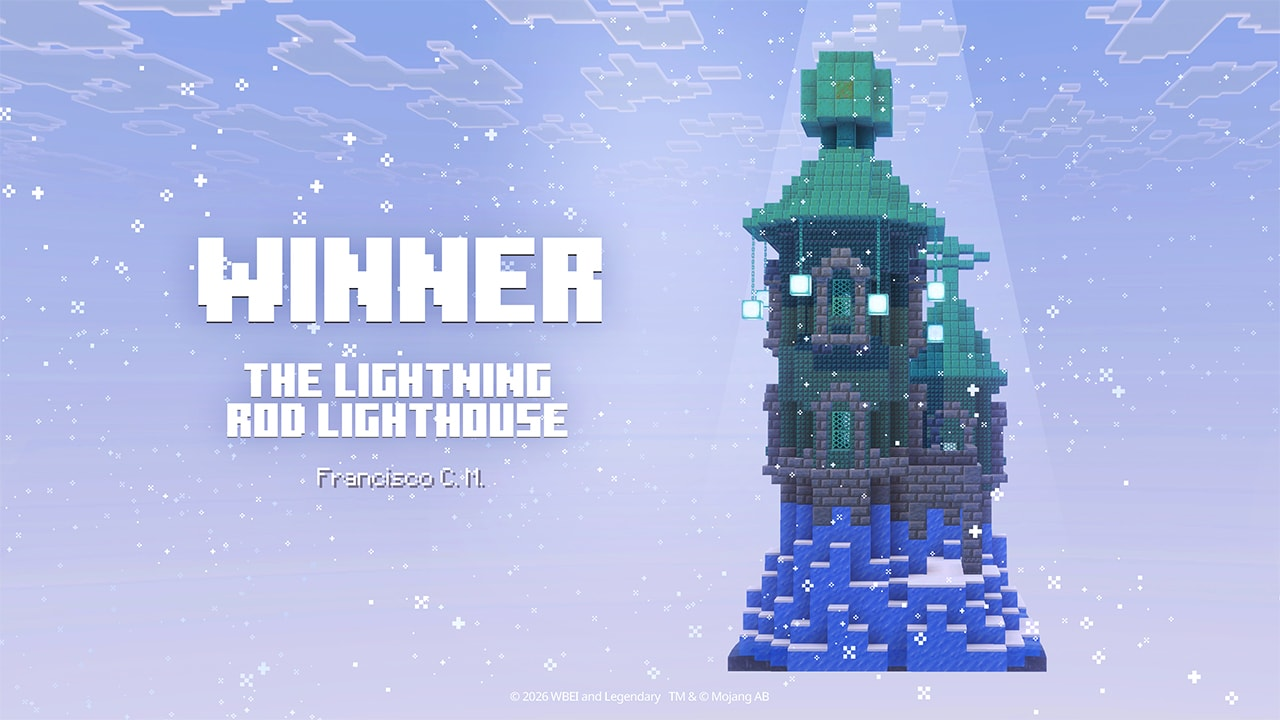
Our practical suggestion is to record one informative overview before experimenting with dramatic close-ups. You then have a useful opening even if the more ambitious camera move does not work.
Prepare the world and camera
- Save the starting position: note the world, dimension and coordinates. Our coordinate journal guide helps you return to the same spot.
- Choose a comfortable field of view: an extremely wide view can exaggerate the edges of a building. Keep the same FOV between comparison shots.
- Decide what the interface contributes: a clean showcase may not need the hotbar, while an installation tutorial needs its menus and a survival demonstration may need health or item information. Do not hide the part that explains the action.
- Keep movement simple: use a short walk, a slow turn or a stationary shot. Reduce view bobbing if you find it distracting and your settings provide that option.
- For staged changes: use a copy of a world you control before changing its mode, weather or scenery. On a shared server, arrange the scene with its owner rather than assuming command access.
Shaders and resource packs can change how your build looks. Name the ones shown if viewers may want the same appearance. For a fair comparison, change the feature being demonstrated while keeping the rest of the setup as consistent as you can.
Record on a computer with OBS Studio
If you already have a recorder that works, you can keep using it. For OBS, start with Tools → Auto-Configuration Wizard and choose your recording needs. Add a source to the scene, check the preview and make a short recording before filming the full tour.
Windows: open Minecraft, add a Game Capture source, and use Capture specific window if you want to select the game explicitly. Choose the running game window, not just the launcher. Game Capture is a Windows source; its absence on a Mac is expected.
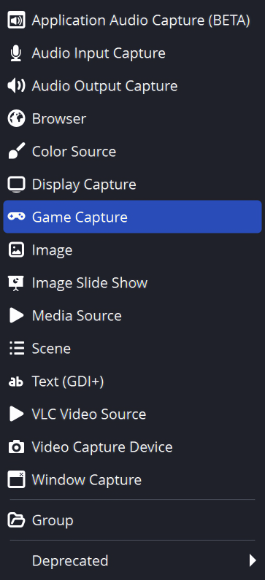
macOS: use macOS Screen Capture to select a display, application or window. On macOS 13 and later this source can also capture audio. OBS 30 and later additionally offer macOS Audio Capture for audio-only capture. Grant the requested screen-recording permissions and test sound in the saved file; an animated game preview alone does not confirm that its audio is being recorded.
Linux: use the capture source appropriate to your desktop session. If the source list or permission prompt differs, follow the OBS documentation for your environment rather than looking for Windows-only Game Capture.
Check the recording folder in OBS settings so you know where the file will go. Click Start Recording, perform a short test, stop and play the resulting file. You do not need to start a stream to save a local video.
Record on a phone or console
- iPhone: add Screen Recording to Control Center if needed, tap it and wait for the countdown. Touch and hold the control to enable the microphone when you want narration. Finished recordings are saved in Photos.
- Android: look for Screen recorder in Quick Settings; add it through Edit if your device supports it but the tile is hidden. Choose audio and touch-display options before starting. Menu names and available options vary by device.
- Consoles: use the console's supported capture controls for Minecraft and check its recording-length and sharing limits. They vary by device and game. If built-in capture does not support the footage you need, investigate a compatible capture setup before planning a long recording.
On mobile, choose the intended orientation before recording and keep it consistent. A landscape game can fit a wide tour naturally; a vertical edit needs deliberate reframing so it does not cut away the door, controls or action. Test with the same device and audio options you will use for the real clip.
Check the sound before the whole take
The official OBS Audio Mixer guide explains the separate meters, volume sliders and mute controls used below.
Watch the Audio Mixer while the game makes a sound and while you speak. Then listen to the saved test using headphones. Game audio, microphone audio and other applications can be separate sources; turn down or remove the ones you do not want.
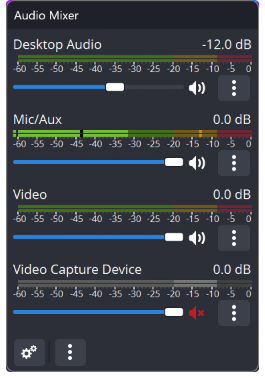
If narration is hard to understand, lower the game sound or record a voice-over afterward. Headphones help stop speaker sound returning through the microphone. A repeated or echoing sound can also come from capturing the same audio twice.
Choose framing and quality your device can sustain
A 16:9 frame such as 1920×1080 is a straightforward starting point for a landscape video. A vertical video uses a different frame: plan for it rather than stretching a wide recording until Minecraft blocks look distorted. Cropping removes part of the view, so inspect what disappears before committing to the edit.
For a modest computer or phone, begin with a short test at manageable settings. A stable recording is more useful than a higher-resolution file full of stutters. If recording struggles, reduce expensive shaders or render distance, close unnecessary applications and consider a lower recording resolution or frame rate. Change one thing at a time so you can tell what helped.
Do not judge recording quality only from the game while playing. Watch the saved clip through a turn, a busy scene and a lighting change. Those moments often reveal problems a stationary preview misses.
A small filming note you can reuse
Video: [house tour / mod demonstration / tutorial]
Viewer should learn: [one useful point]
World and start: [dimension, XYZ, facing landmark]
Look: [time of day, FOV, packs or shaders]
Shots: [overview → action → detail → result]
Audio: [game only / live voice / voice-over]
Before finishing: [play the saved test and check the important moment]
Give clips short names such as house-exterior-01 and house-kitchen-02. Keep the original recordings while editing, and note the best take so you do not have to reopen every file later.
Finish with the viewer in mind
- Remove loading screens and long empty walks unless they explain something.
- Keep text large enough to read on a phone and away from the action.
- Add accurate captions for speech and meaningful sounds, and correct automatic captions where Minecraft names are wrong.
- Credit a featured build, map or add-on and link its creator. Mention visual packs when they affect what viewers see.
- Check for private chat, notifications and server details before sharing. Let friends know if their voices will be included.
- Use the final viewing size to check that the result, controls or build detail remain visible after cropping.
Quick fixes for disappointing footage
- Black preview: check the selected source, running game window and required capture permissions. Consult the matching OBS capture guide for your operating system.
- Video but no sound: check which audio source is active, its mute control and the saved test recording.
- Stuttering: simplify the scene or recording settings, then test the same movement again.
- Warped blocks or missing edges: fix the frame's aspect ratio; do not stretch the capture to hide a mismatch.
- A confusing tour: add a steady overview and show the entrance before the interior.
- A comparison looks unfair: match the position, FOV and lighting, and state the feature you changed.
Sources and practical help
- OBS Quick Start Guide — recorder setup and original interface images.
- OBS Game Capture setup for Windows.
- OBS macOS Screen Capture and Mac audio capture.
- OBS framing, scaling and aspect ratios.
- Apple: screen recording on iPhone.
- Google: Android screen recording.
- W3C: planning accessible video.
The shot plan and filming suggestions are MineBrush editorial guidance. The cover is an original MineBrush illustration; the credited screenshots show their sources' examples.
More from MineBrush.
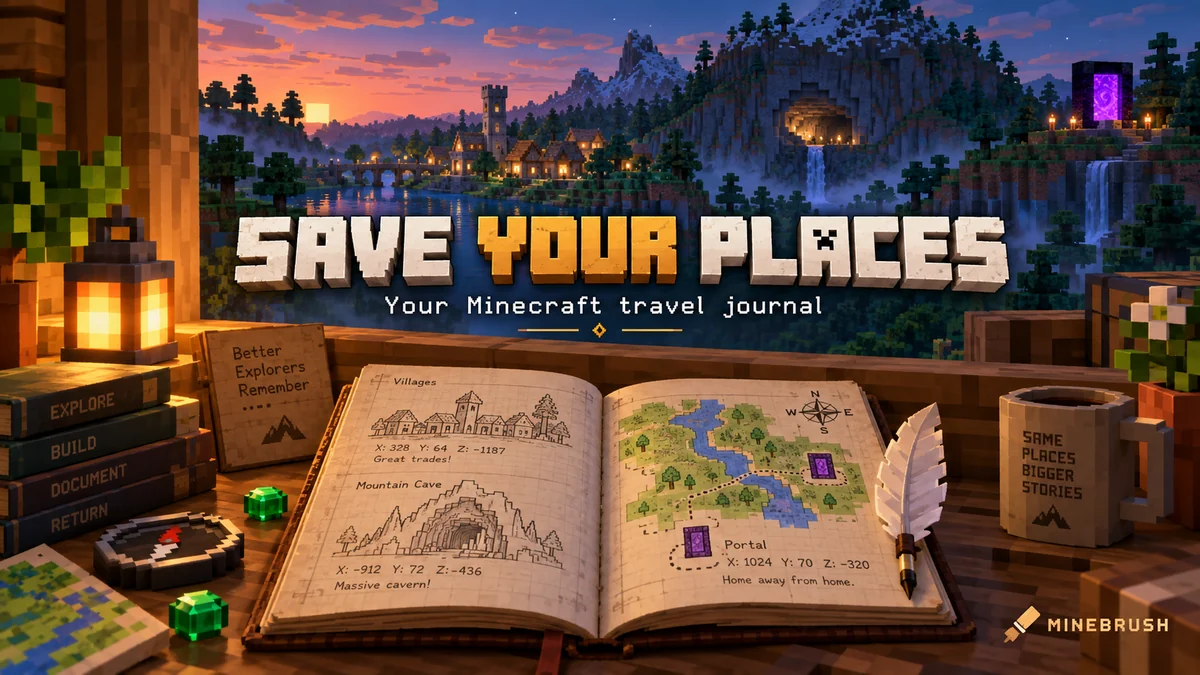
Save Your Minecraft Places — Keep useful coordinates for your base, caves and portals. Make a simple travel journal, share clear directions with friends and keep your notes available after a death.
- Edition
- Cross-edition
- Difficulty
- Beginner
- Time
- Start before your next outing
Keep home and portal notes accessible outside your inventory
MineBrush · Guide
Save Your Minecraft Places
Save Your Minecraft Places — Keep useful coordinates for your base, caves and portals. Make a simple travel journal, share clear directions with friends and keep your notes available after a death.
Keep home and portal notes accessible outside your inventory
- Minecraft version
- Java and Bedrock — record your world and dimension
- Game edition
- Cross-edition
- Platform family
- Cross-edition
- Supported devices
- Java PC · Bedrock PC, mobile and consoles
- Install format
- In-page guide and note template
- Touch readiness
- Check guide
- Resource type
- Guide
- Compatibility confidence
- Source claimed
- Card evidence statement
- Coordinate examples and book controls explained
- Card delivery statement
- Read the guide and copy the note template
- Card limitation note
- Keep home and portal notes accessible outside your inventory
- Edition applicability
- Java + Bedrock
- Estimated time
- Start before your next outing
- Guide difficulty
- Beginner
- Delivery state
- No file
- Lifecycle state
- Current
Reach a village, new base or cave without losing the way home. Read coordinates, choose a sensible path, mark useful landmarks and use maps or compasses correctly.
- Edition
- Cross-edition
- Difficulty
- Beginner
- Time
- Plan before your trip
Useful waypoints, sensible supplies and a return path
MineBrush · Guide
Find Your Way and Get Home
Reach a village, new base or cave without losing the way home. Read coordinates, choose a sensible path, mark useful landmarks and use maps or compasses correctly.
Useful waypoints, sensible supplies and a return path
- Minecraft version
- Java and Bedrock
- Game edition
- Cross-edition
- Platform family
- Cross-edition
- Supported devices
- Java PCs · Bedrock devices
- Install format
- Coordinates, landmarks and navigation guide
- Touch readiness
- Check guide
- Resource type
- Guide
- Compatibility confidence
- Source claimed
- Card evidence statement
- Official navigation guidance and illustrations
- Card delivery statement
- Plan a route in your own world
- Card limitation note
- Useful waypoints, sensible supplies and a return path
- Edition applicability
- Java + Bedrock
- Estimated time
- Plan before your trip
- Guide difficulty
- Beginner
- Delivery state
- No file
- Lifecycle state
- Current
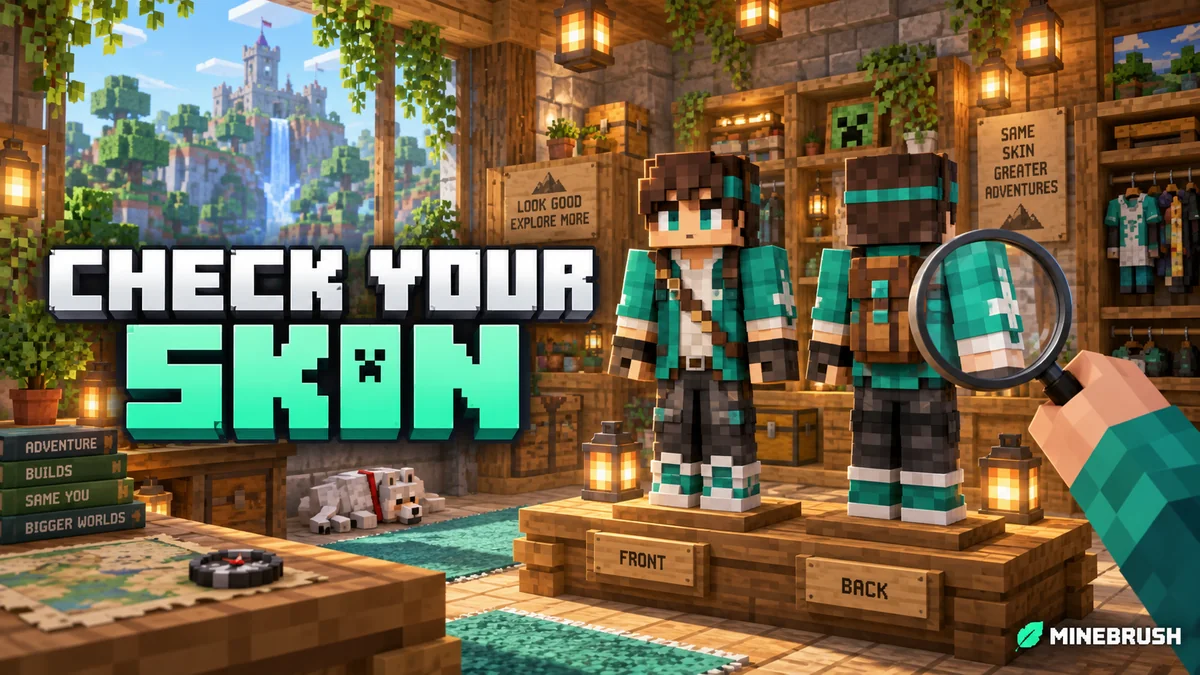
Check Your Minecraft Skin — Find wrong arm models, unfinished sides and missing outer-layer details. Preview poses, check the skin in Minecraft and make clear images before sharing it.
- Edition
- Cross-edition
- Difficulty
- Beginner
- Time
- A short check
Fix visible problems before wearing or sharing your skin
MineBrush · Guide
Check Your Minecraft Skin
Check Your Minecraft Skin — Find wrong arm models, unfinished sides and missing outer-layer details. Preview poses, check the skin in Minecraft and make clear images before sharing it.
Fix visible problems before wearing or sharing your skin
- Minecraft version
- 64×64 skins · Classic and Slim
- Game edition
- Cross-edition
- Platform family
- Cross-edition
- Supported devices
- Java PC/Mac/Linux; Bedrock Windows, Android and iOS imports
- Install format
- Preview your own skin PNG in a browser and Minecraft
- Touch readiness
- Check guide
- Resource type
- Guide
- Compatibility confidence
- Source claimed
- Card evidence statement
- Actual editor capture and credited interface examples
- Card delivery statement
- Model, layers, poses and in-game appearance
- Card limitation note
- Fix visible problems before wearing or sharing your skin
- Edition applicability
- Java + Bedrock
- Estimated time
- A short check
- Guide difficulty
- Beginner
- Delivery state
- Direct download
- Lifecycle state
- Current
Player discussion 0
Questions, discoveries and help from other players.