
MineBrush publication
Minecraft Tricky Trials: Chambers, Mace, Vaults & Crafter Guide
Find trial chambers, beat the breeze, match keys to vaults and prepare for ominous trials. Learn mace and wind-charge tricks, build your first crafter and put copper, tuff and dungeon rewards to use.

Tricky Trials turns an underground expedition into something you can prepare for, learn and tackle again with friends. Find a trial chamber, survive its waves of enemies, use keys to open vaults and decide whether you are ready for a tougher ominous trial. The rewards have uses beyond the dungeon: wind charges help with movement, the mace rewards precise airborne attacks, and the crafter brings automatic crafting into your workshop.
The update launched on June 13, 2024, in Java Edition 1.21 and Bedrock Edition 1.21. Its core features remain part of later vanilla releases; this guide explains the original update and practical ways to use its additions. You do not need a separate Tricky Trials mod or map. Use the official game launcher or your device's Minecraft update option, and back up an established world before updating it.
Find a trial chamber and make your first visit manageable
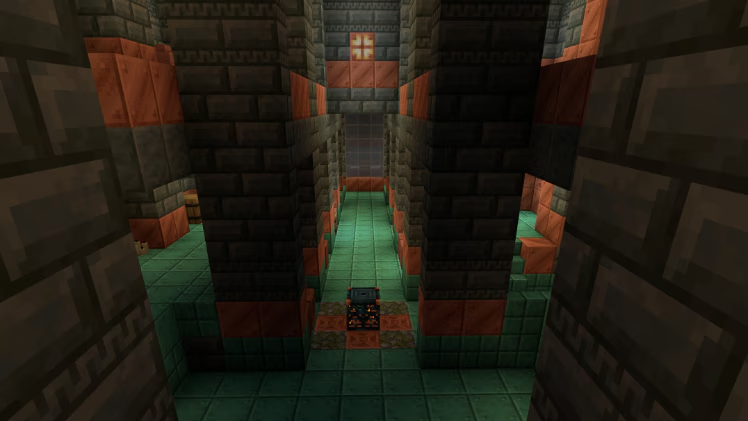
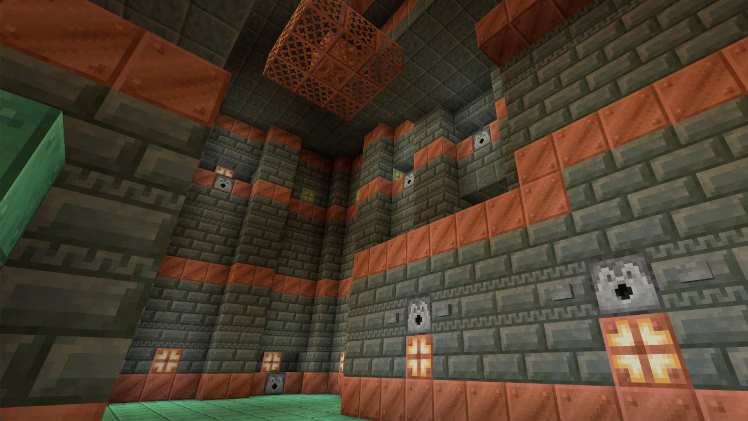
Trial chambers generate underground in the Overworld's deepslate layer. Their copper and tuff corridors lead to different room layouts, combat areas, decorated pots and supply barrels. A journeyman cartographer can sell a Trial Explorer Map, giving you a deliberate destination instead of relying on a lucky cave opening. In an older world, explore newly generated terrain for structures that did not exist when that area was created.
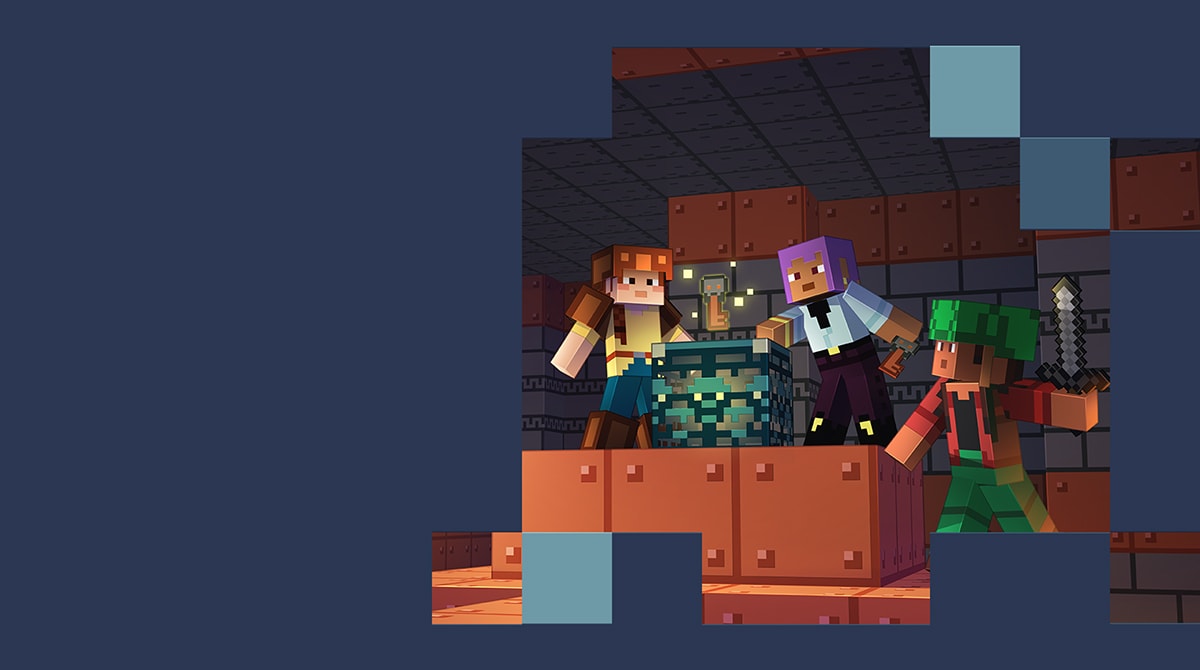
For a first attempt, bring armor in good condition, a reliable weapon, a shield, food, building blocks and a pickaxe. Carry a water bucket for awkward drops and a milk bucket if you want an answer to poison. Milk also removes beneficial effects, so avoid using it casually after drinking helpful potions. Leave valuables you do not need at home.
- Make a return point. Place a bed and supply chest somewhere safe outside the fighting rooms. Mark the route back to the surface before getting distracted by loot.
- Look before stepping closer. Identify spawners, ledges, holes and a retreat route. Pots and barrels can provide useful supplies, but do not empty your attention into a container while enemies approach.
- Start with one combat area. Advance carefully so you do not activate several nearby challenges at once. Let enemies come toward a position you can defend.
- Finish the wave before collecting everything. Once all enemies from that trial are defeated, the spawner ejects rewards and enters its cooldown. Check the ground for the drops.
- Bank your first haul. A successful small trip teaches you the layout and keeps your first keys and breeze rods safe. You can return with better supplies.
A practical plan for two to four friends
Choose one ordinary combat area for your first team attempt. Agree on a return point before anybody approaches its spawner. These are suggested jobs to share, not character classes: everyone still needs food, armour and a usable weapon.
- Front and route: one player watches nearby melee enemies and keeps track of the way back. This is not an invitation to absorb every hit.
- Ranged threats and rear: a second player calls out skeletons or bogged, checks side passages and watches a friend who is eating or recovering.
- With a third or fourth player: share those tasks between different sightlines. Avoid having everybody chase the same breeze while another enemy attacks from behind.
Use four clear calls: ready, enter, back, clear
- Ready: check that everybody is present, has food on the hotbar and knows the route back. Leave spare equipment in a secure supply point. In ordinary Survival, check your respawn arrangements; Hardcore does not offer a return after death.
- Enter: approach together when everyone agrees. Announce a late arrival. A spawner increases its challenge as it detects additional participants; leaving afterwards does not immediately lower the encounter’s difficulty.
- Back: when someone needs to recover, say it early and move toward the agreed point. Do not block the passage with a new wall or lead the retreat through an unexplored room. The other players watch the approaching threats instead of all opening inventories.
- Clear: finish the encounter and check the surrounding space before collecting. Gather the spawner’s drops, sort the keys and then visit the appropriate vaults.
The participant and reward rules are documented in the official Java and Bedrock 1.21 release notes. A retreat is a chance to recover, not a promise that the room resets or becomes harmless.
If somebody falls, recover deliberately
Call out the location and what is still attacking. A surviving player should first check whether the route is usable; the returning player should bring the spare kit rather than repeatedly rushing in empty-handed. If somebody picks up a friend’s equipment while clearing space, return it at the supply point. Do not assume that another player’s defeat has removed the remaining mobs.
Share the loot, then decide whether to escalate
Agree how to share loose rewards before the trip. Vault access is personal, but keys are still required: one friend opening a vault does not give everybody its loot. Let players take their turns without crowding the drop area, and record which vaults each person has already used.
Only start an ominous attempt by agreement. Bank the first haul and refill supplies before anyone uses an ominous bottle. A player carrying the relevant omen can change the nearby challenge for the group; everybody does not need to drink a bottle. Keep watching overhead and the floor during that harder encounter. Normal and ominous keys open different vault types; use the key guide and ominous-trial section below.
Fight the room, not just the nearest enemy
A trial spawner runs a limited encounter rather than spawning enemies endlessly. Torches do not disable it, and mining it is not a way to take a reusable spawner home. After a completed trial, its normal cooldown is 30 minutes. Use that time to explore another room, sort supplies or leave the chamber.
Breeze: close the distance without chasing it off a ledge
The breeze jumps around and fires wind charges that knock you back. It deflects most projectiles, so repeatedly shooting arrows is a poor plan. Fight from solid footing, use corners as cover and move in for melee when it lands. Your own wind charges are a notable exception to its projectile deflection, but they do not replace keeping control of your position.
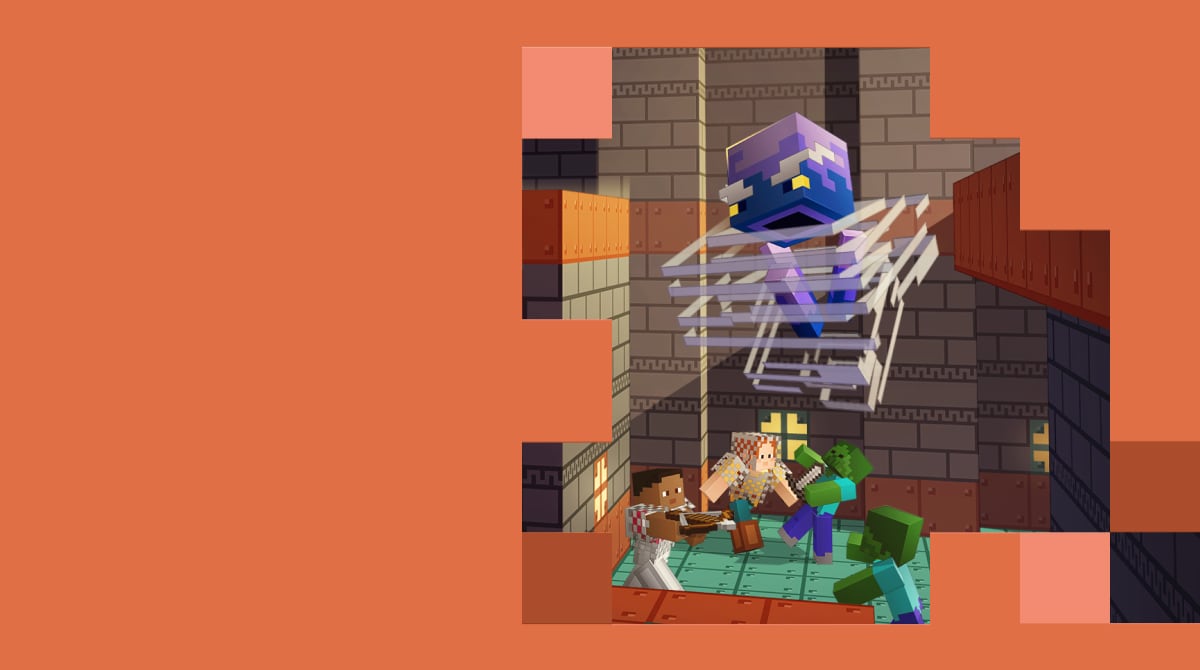
Wind bursts can activate buttons, levers, wooden doors, trapdoors and fence gates. A doorway that seemed safe can change during combat. Avoid standing with your back to an open drop. Breezes killed by a player drop breeze rods, used for wind charges and the mace; Looting can increase the rod haul.
Bogged: break its line of sight
The bogged is the mossy skeleton variant that fires poison arrows. It appears in some trials and also naturally in swamps and mangrove swamps. Duck behind cover, block incoming shots with a shield when positioned correctly, and close the gap between volleys. Poison makes a messy multi-enemy encounter harder to recover from, so prioritize a bogged with a clear shot at you.
Other rooms can involve zombies, husks, spiders, cave spiders, silverfish, slimes or other skeleton variants. Adjust your approach to what is actually present: a narrow passage helps against some melee enemies but can trap you with a cave spider or leave you exposed to an archer. Keep your escape route usable.
Trial keys and vaults: what you can open and what resets
The spawner is the encounter; the vault is a separate reward block. A trial can reward you with a trial key. Take a normal trial key to a normal vault and use it on the block. The vault consumes the key and ejects its loot. A normal key does not open an ominous vault, and an ominous key is for the ominous version.
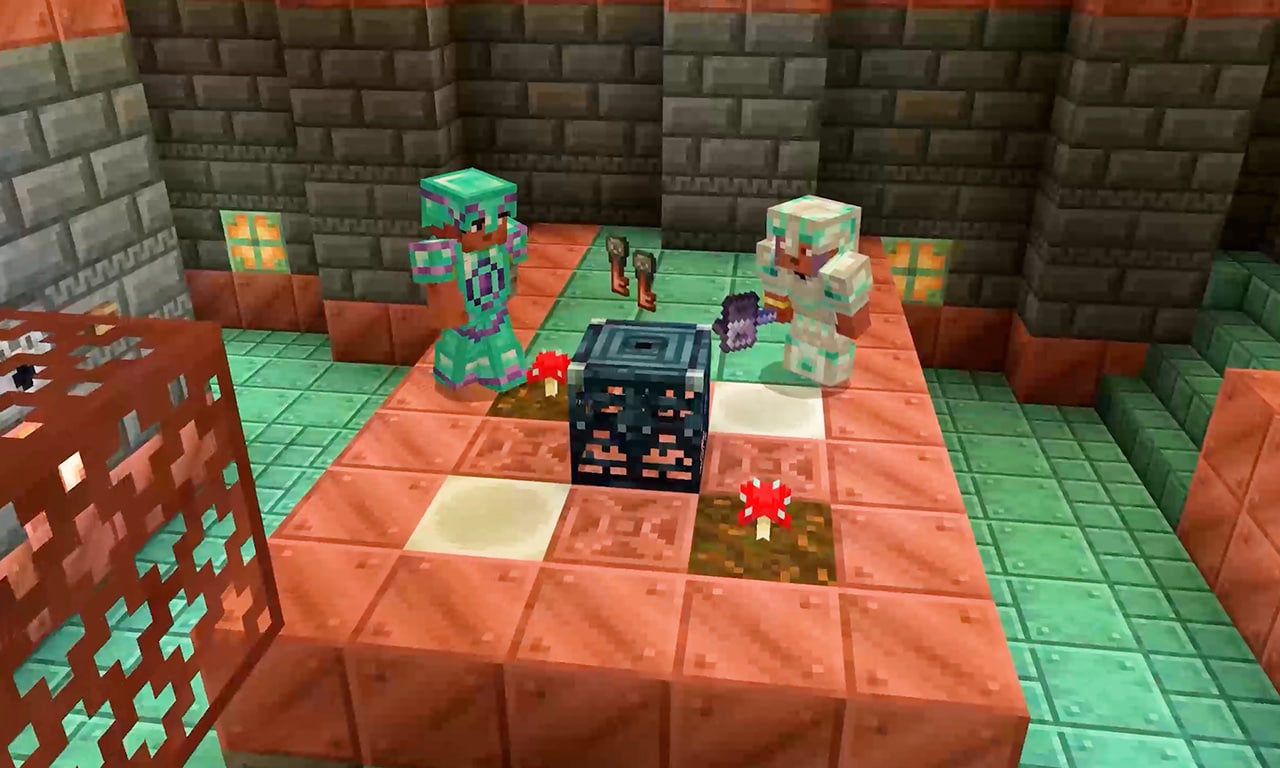
- Each player gets their own chance at a vault. A friend opening it does not use up your personal opportunity; you still need your own key.
- Each individual vault opens only once for you. Waiting for the spawner's cooldown does not reset that vault's memory of your visit. Search for a different vault when you want another roll.
- Rewards are random. The item displayed inside is not a prize you can select by timing your click. Do not promise yourself a particular enchanted item on the next key.
- Vaults stay where they are. You cannot collect one with Silk Touch and install a refillable reward machine at home.
For a group, this makes exploring together more rewarding than racing to empty one ordinary chest. For a solo player, it creates a reason to keep exploring new chambers even after learning how to beat a familiar spawner.
Ominous trials: choose the harder fight when you are ready
An ominous bottle gives Bad Omen when you drink it. Near a trial spawner, that becomes Trial Omen and can turn an eligible spawner into an ominous trial spawner. Expect tougher encounters, including better-equipped enemies and dangerous effects or projectiles appearing overhead. This is an optional escalation, not a requirement for learning the normal rooms.
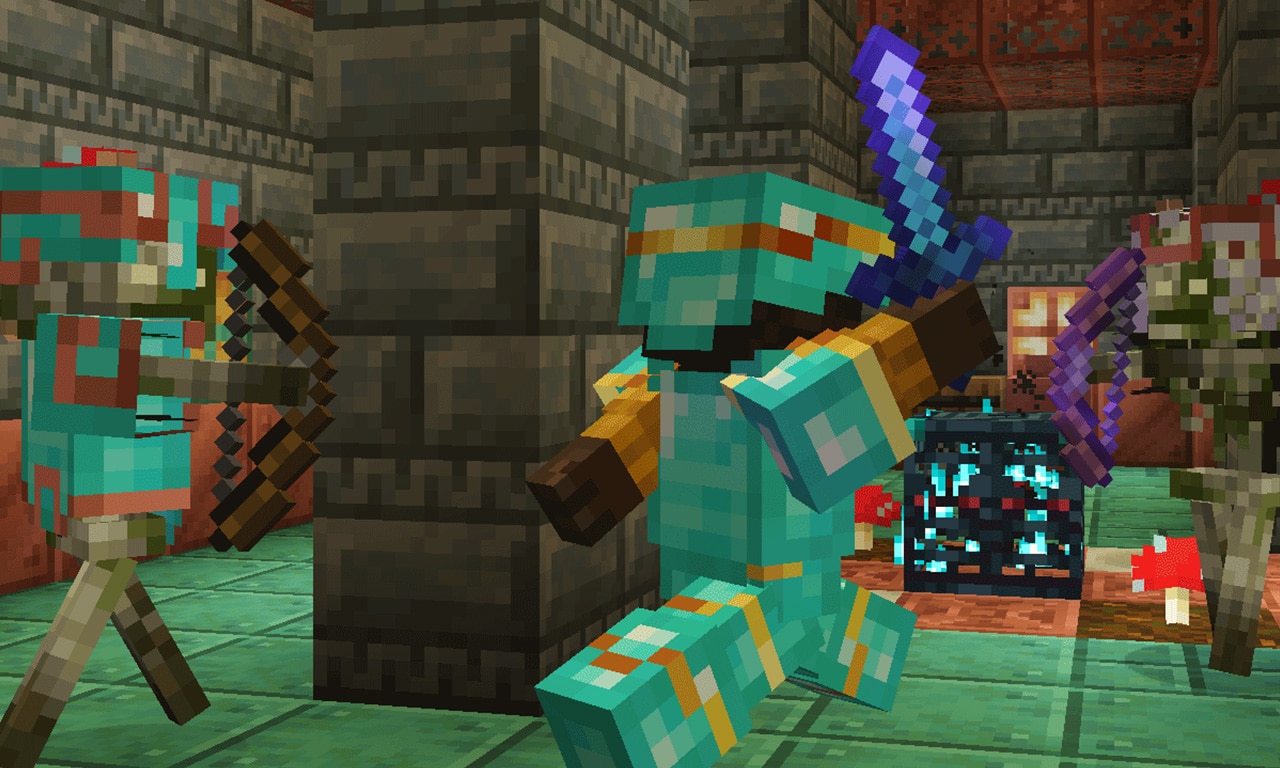
A sensible progression is to finish a normal room, understand its corners and hazards, then return well supplied with an ominous bottle. Do not drink one before wandering through your home village: Bad Omen can instead become Raid Omen there, starting a 30-second countdown toward a raid. Milk can remove Raid Omen before that countdown finishes. Store bottles until you deliberately want the event.
Ominous trial spawners can reward ominous trial keys. Use those on ominous vaults for their separate loot pool. The heavy core needed for a mace and the Wind Burst enchantment come from ominous vault rewards, and neither is guaranteed. Bring spare inventory space and expect to search more than one vault.
A higher-level bottle makes Trial Omen last longer; it is not a promise of a heavy core. Also remember that activating an ominous encounter can make a previously completed normal spawner dangerous again. Do not treat a cooling-down room as a permanent safe campsite.
Turn breeze rods into movement and a new fighting style
Wind charges: short movement tricks and remote interactions
Craft one breeze rod into four wind charges. A charge thrown at a nearby surface creates a burst that can launch you, making it useful for reaching a ledge, designing a jumping challenge or setting up a mace attack. Practice on flat ground with a clear landing area before trying it above lava or a ravine.
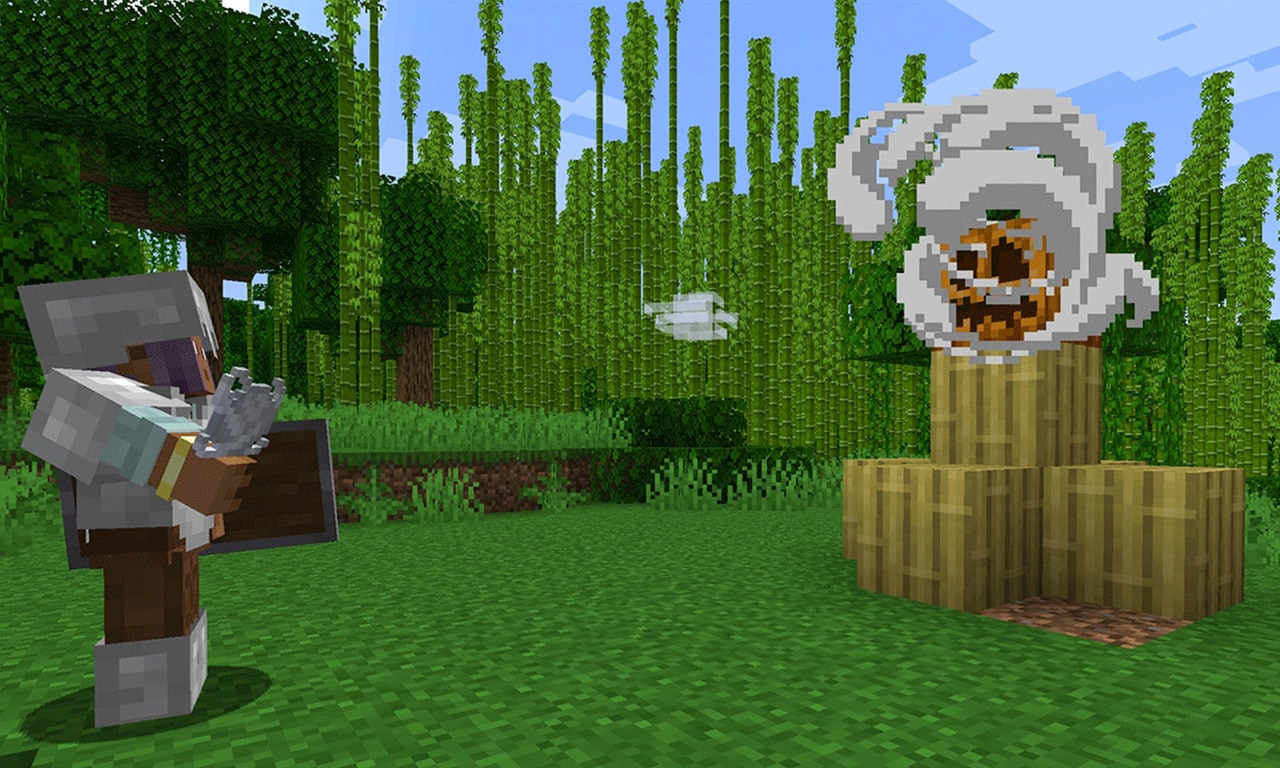
For a simple practice course, place a low platform beside a clear patch of ground. Aim a charge near your feet, learn the launch timing, and then try landing on the platform. The launch has special fall-damage handling, but falling below the height you launched from can still hurt you. It is not unlimited fall protection.
Charges can also trigger buttons, levers and certain doors or gates from a distance, and dispensers can fire them. This suits a target-operated gate or an adventure-map puzzle. Keep valuable decorated pots away from the target area, because impacts can break them.
Mace: a successful hit is what makes the drop safe
Craft a mace with a heavy core above a breeze rod. Its special smash attack activates after falling more than 1.5 blocks before a hit. A successful smash adds damage based on the fall and cancels the accumulated fall damage. Missing the target does not. Start from a modest height, aim at an isolated enemy and leave yourself a safe landing option.
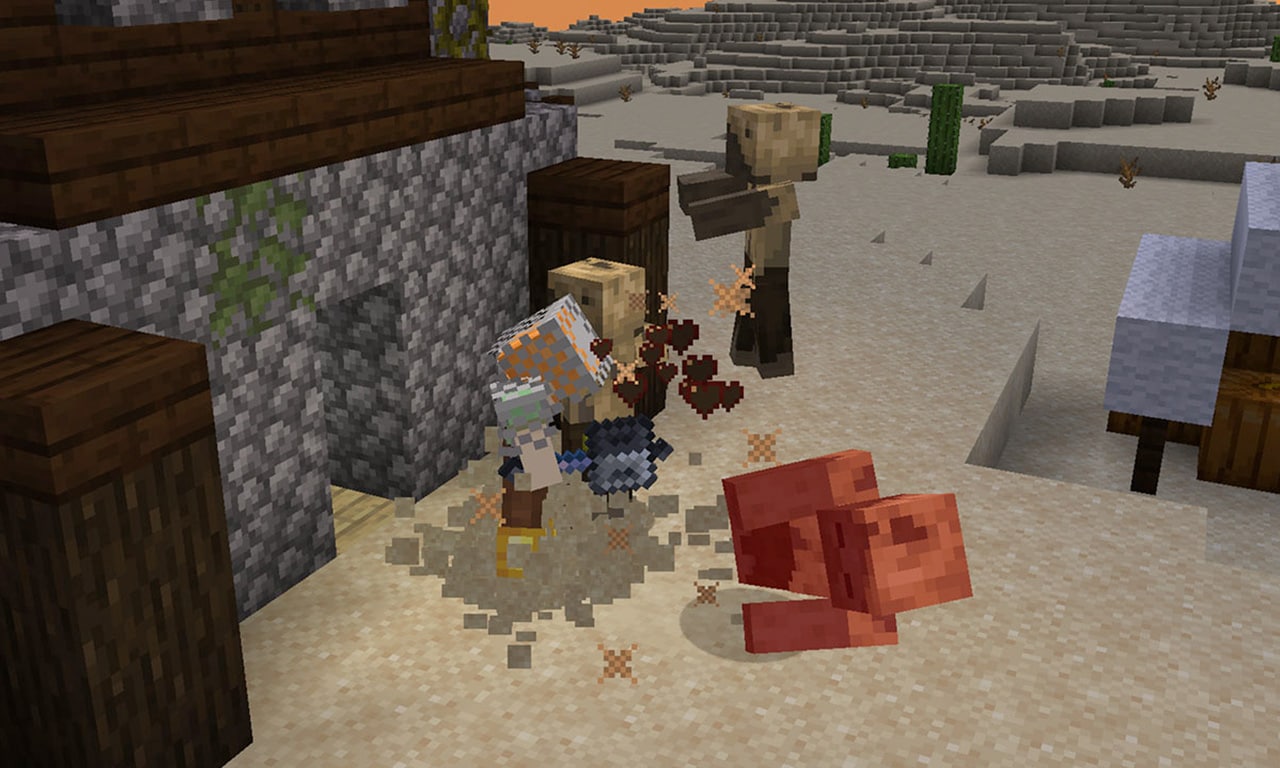
Keep a conventional weapon available for cramped corridors or enemies you cannot line up from above. The mace is especially interesting in open fights and custom arenas; it does not make every ordinary swing better. Breeze rods can repair it at an anvil.
- Density increases the damage added by a fall. Choose it for a playstyle focused on smash attacks.
- Breach reduces how much enemy armor protects against the attack. It is more relevant when your targets wear armor.
- Wind Burst launches you after a successful smash, allowing another airborne attack. Plan the next landing; being bounced up does not make a missed follow-up harmless.
Density and Breach cannot be combined on the same mace in normal Survival enchanting. Wind Burst is an ominous-vault reward rather than an ordinary enchantment-table option. Choose your build for the fights you actually enjoy instead of chasing every enchantment as if they all stack.
Build a simple crafter you can understand before adding a clock
The crafter uses a crafting grid, but a redstone pulse tells it to craft and eject the result from its front. You can disable individual slots to shape the recipe. Hoppers can supply ingredients, which is what makes automatic production possible. A steady power signal is not a stream of repeated crafts; repeated production needs repeated pulses.
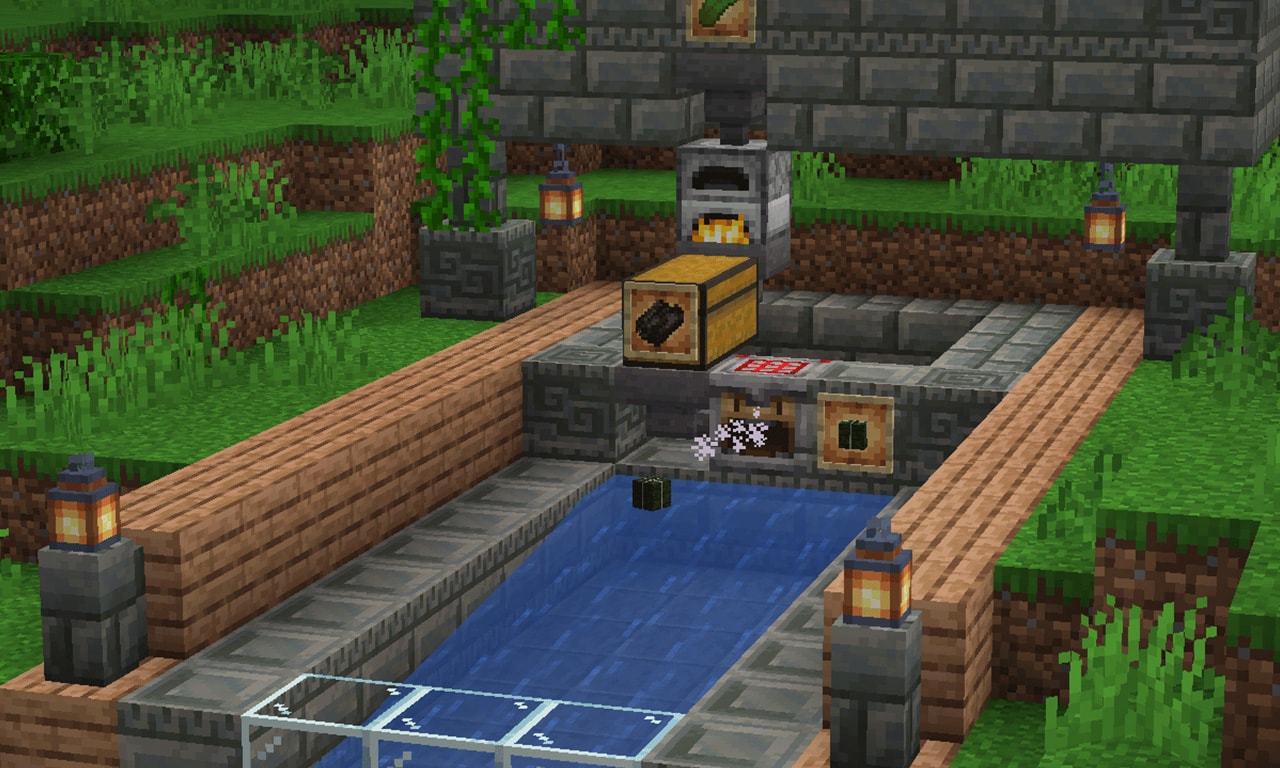
Try a log-to-plank station as a first project:
- Craft a crafter using five iron ingots, two redstone dust, a crafting table and a dropper, or select its recipe in the recipe book.
- Place it facing an output chest so crafted items have somewhere to go.
- Open its grid and disable eight empty slots. Leave one enabled slot for ordinary logs.
- Put logs into that slot. Check that the recipe preview shows the planks you want.
- Place a button where it powers the crafter and press it once. One log should be crafted into four planks.
- After the manual version works, add an input hopper from a log chest. Keep it to one ingredient type while learning; press the button for each crafting operation.
This gives a workshop a useful bulk-material station without hiding the process behind a complicated circuit. A later redstone clock can provide repeated pulses, but first check where the output goes and whether ingredients arrive reliably.
Recipes using several slots need more care. For example, a crafter intended to make iron blocks must not fire when the grid only contains the recipe for iron nuggets. The machine does not remember your intention; it crafts the recipe currently present. Control ingredient placement and only trigger it once the required slots are ready. A comparator can help monitor filled and disabled slots when you progress to more advanced designs.
Use the blocks and collectibles after the expedition
A copper-and-tuff workshop
Use tuff bricks for a sturdy frame, polished tuff for a smoother floor and copper grates for industrial walkways or window details. Grates let light through, which helps a layered workshop feel less enclosed. The stonecutter makes it easier to obtain the tuff shapes you need without repeatedly arranging different recipes.
Copper bulbs toggle on or off with a redstone pulse. Put a button by a workshop entrance for lighting that stays in its last state after the button releases. Oxidation makes bulbs dimmer; wax a finish you want to preserve, or use an axe to work back toward a brighter copper state. Copper doors can be opened by hand, so use them for appearance rather than assuming they provide iron-door access control.
A trophy room with a reason to revisit chambers
Display your mace, use new paintings to break up a large wall, and build a listening corner for the update's music discs. Precipice can appear in normal vault loot, Creator in ominous vault loot, and Creator (Music Box) in decorated pots in trial chambers. These are different collection goals, not three guaranteed rewards from one battle.
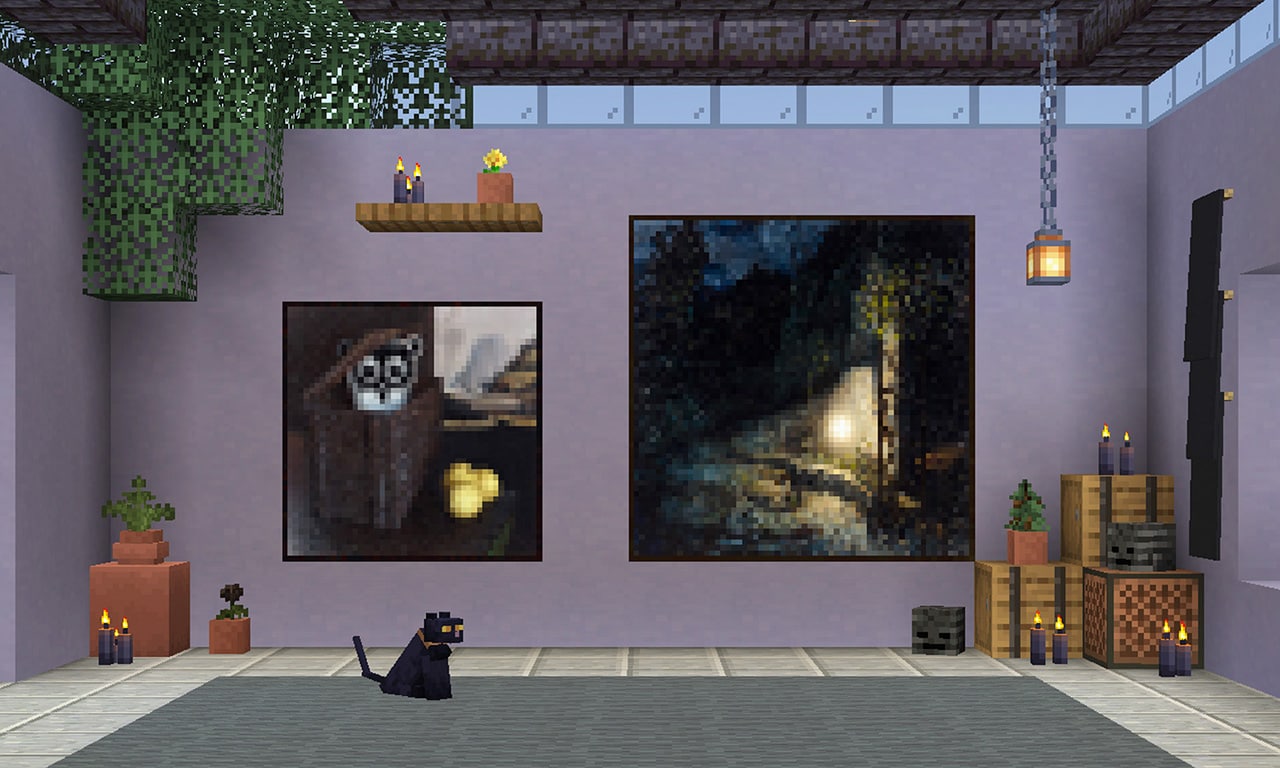
The Bolt and Flow armor trims give normal and ominous vault explorers different cosmetic goals. New Flow, Guster and Scrape pottery sherds also let you bring the chamber theme into decorated pots at home. Keep a record of vaults you personally opened so you spend the next trip exploring rather than trying the same used reward block again.
Four unusual potions for experiments and challenge maps
Tricky Trials adds effects brewed from an awkward potion: stone for Infestation, a slime block for Oozing, a cobweb for Weaving and a breeze rod for Wind Charging. Their effects create consequences when affected entities are hurt or die: silverfish, slimes, cobwebs or a wind burst. Wind Charging is not a flight potion.
These effects are useful for designed encounters and controlled experiments, but can make a crowded pen or combat room much less predictable. Try them in a contained space with expendable supplies before adding them to a farm or an adventure challenge. Keep these potions separate from the healing and protection supplies you use during an ordinary expedition.
Use the other Java and Bedrock 1.21 improvements
Java: make a practical portal route
Java 1.21 lets you ride entities such as horses and minecarts through portals. The usual teleport delay does not apply when riding through, so finish the receiving area before taking a valuable mount on its first trip.
A simple transport project: build a broad, enclosed arrival platform, clear the approach on both sides and use a spare horse or an empty transport setup for your first check. Once the route is predictable, add signs and an exit path. Do not let a portal open straight onto a cliff or a cramped room where the rider has no space.
Ender pearls thrown through portals can also teleport their owner between dimensions. That is not the same as the later Java 1.21.2 change that keeps a travelling pearl's area active. Use our Java 1.21.2 differences section when comparing pearl systems across these versions. These Java transport changes should not be assumed to describe Bedrock.
Java: small workshop changes with a clear use
Doors made from different materials can form a double door. Try one wood on the exterior side of a divided workshop and another beside the interior palette, then check the hinge arrangement. A matched pair is no longer the only visual option.
Witches now drop four to eight redstone dust on death before considering any additional Looting effect, making witch-hut farming more useful when a growing workshop needs dust. Piston sounds are also quieter and carry less strongly, which helps a working mechanism fit beside a living area. This does not change how its circuit needs to be powered.
Bedrock: adjust the touch layout before a chamber fight
The new d-pad gains slide-off persistence and revised default size and position. Customization can move it closer to the hotbar. The jump and ascend-in-water buttons overlap so staying above water is easier. Check the layout on dry ground and then in a shallow pool before relying on it during combat or a cave escape.
For players using an external keyboard on mobile, this release fixes several unbindable keys and keyboard navigation through the inventory. Touch item movement also gets clearer visuals, and the stack-splitting window no longer appears for items that cannot stack. Rehearse moving food and blocks between inventory and hotbar; a familiar layout is more useful in a fight than learning it under pressure.
Bedrock: show progress and recheck old farms
Turn on Show days played in the world's settings to display the day count. It gives a shared expedition or building challenge a useful marker: take a picture before the first trial-chamber visit and another when the workshop is finished. The counter is not a time limit or a Hardcore setting.
Natural mobs now spawn at the center of a block. Mojang explicitly notes that this corrects spawning in narrow spaces and on slopes but can affect player-made farms. If output changes after updating a Bedrock farm, start by checking the design's supported version and its spawning spaces. Do not rebuild a working redstone controller before checking whether the mobs are spawning differently.
You can also stand on boats floating on water, and sprinting no longer starts with the old delay. Try the movement changes in a safe area before using a boat as a temporary platform or committing to a jump. They are conveniences, not protection against knockback or falling into the water.
Questions that come up during the first few trips
Can I play Tricky Trials on a phone or console?
Yes. Its core additions released for Bedrock as well as Java. Use the stable version supported by your device; snapshots and Preview builds are not required for these released features. Java and Bedrock have different multiplayer ecosystems, so friends must choose compatible editions and server versions.
Why is a trial spawner doing nothing?
It may be in its cooldown, or you may not be close enough for the encounter to register you. Creative and Spectator players do not activate normal Survival trials in the same way. Look at the spawner's state and whether the previous encounter was fully completed before assuming the world is broken.
Why does my key not work?
Check the vault type, then whether you already opened that exact vault. Normal and ominous keys are not interchangeable. A fresh key does not override the once-per-player rule.
Do I have to find a heavy core to benefit from the update?
No. Normal exploration gives combat practice, loot and breeze rods, while the crafter and new building blocks offer projects away from the dungeon. Treat the mace as a longer-term goal if you enjoy the harder trials.
What is a good first-evening plan?
Prepare supplies, follow a Trial Explorer Map, mark the entrance, finish one ordinary combat room and open a matching vault if you obtain a key. Bring the loot home, try wind charges somewhere safe and build the manual log-to-plank crafter. Save ominous trials for a return trip when you understand the chamber.
Official sources and related updates
Features and release details: Mojang Studios' Java 1.21 release notes, Bedrock 1.21 release notes and official Tricky Trials feature gallery. Gallery images are credited beside each image and link to the originals. The cover is a MineBrush editorial illustration; the practical routes and building examples are editorial suggestions based on the documented mechanics.
For later building and exploration projects, see The Garden Awakens: resin, pale oak and creaking encounters and The Copper Age: copper golems and workshop organization.
More from MineBrush.
Explore the pale garden, follow a creaking to its heart and collect resin for your next build. Practical daytime and nighttime routes, pale oak growing tips, eyeblossom uses and original Mojang screenshots.
- Game released
- Java
- 1.21.4 · Stable
- Bedrock
- 1.21.50 · Stable
Focus Pale garden exploration, creaking hearts, resin collection, pale oak and eyeblossom builds
Topic The Garden Awakens
Install Included in the official game update
Heart-linked creakings require finding their heart; ordinary attacks do not defeat them.
Java + Bedrock · Release
The Garden Awakens: Explore, Gather and Build
Explore the pale garden, follow a creaking to its heart and collect resin for your next build. Practical daytime and nighttime routes, pale oak growing tips, eyeblossom uses and original Mojang screenshots.
Heart-linked creakings require finding their heart; ordinary attacks do not defeat them.
- Update type
- Major release
- Release channel
- Unknown / not stated
- Official release date
- 2024-12-03
- World safety
- Back up before updating
- Player impact
- Pale garden exploration, creaking hearts, resin collection, pale oak and eyeblossom builds
- Platform family
- Cross-edition
- Supported devices
- Java on Windows, macOS and Linux; Bedrock on supported mobile, console and Windows devices
- Install format
- Official game update
- Touch readiness
- Check guide
- Resource type
- Update
- Last verified at
- Sep 17, 2026
- Update state
- historical
- Compatibility confidence
- Source claimed
- Bedrock version/build
- 1.21.50
- Card delivery statement
- Included in the official game update
- Card limitation note
- Heart-linked creakings require finding their heart; ordinary attacks do not defeat them.
- Edition applicability
- Java + Bedrock
- Java version/build
- 1.21.4
- Shared update topic
- The Garden Awakens
- Delivery state
- No file
- Lifecycle state
- Superseded
- Java update channel
- Stable
- Bedrock update channel
- Stable
Build a copper-golem sorting room, swap tool kits with powered shelves and put copper equipment and decorations to work. Practical recipes, examples and official images for Java 1.21.9 and Bedrock 1.21.111.
- Game released
- Java
- 1.21.9 · Stable
- Bedrock
- 1.21.111 · Stable
Focus Copper golem sorting, quick tool swaps and copper builds
Topic The Copper Age
Install Included in the game update
Back up before updating
Java + Bedrock · Release
The Copper Age
Build a copper-golem sorting room, swap tool kits with powered shelves and put copper equipment and decorations to work. Practical recipes, examples and official images for Java 1.21.9 and Bedrock 1.21.111.
Back up before updating
- Update type
- Major release
- Release channel
- Java & Bedrock
- Official release date
- 2025-09-30
- World safety
- Back up before updating
- Player impact
- Copper golem sorting, quick tool swaps and copper builds
- Related major release
- The Copper Age
- Platform family
- Cross-edition
- Supported devices
- Java on PC, Mac and Linux; Bedrock on supported phones, consoles and Windows PCs
- Install format
- Official game update
- Touch readiness
- Check guide
- Resource type
- Update
- Last verified at
- Sep 16, 2026
- Update state
- historical
- Compatibility confidence
- Source claimed
- Bedrock version/build
- 1.21.111
- Card delivery statement
- Included in the game update
- Edition applicability
- Java + Bedrock
- Java version/build
- 1.21.9
- Shared update topic
- The Copper Age
- Delivery state
- No file
- Lifecycle state
- Superseded
- Java update channel
- Stable
- Bedrock update channel
- Stable

Raise a happy ghast, turn it into a flying building platform and carry friends or mobs across your world. A practical Chase the Skies guide for Java 1.21.6 and Bedrock 1.21.90, with recipes, flight tips and original Mojang screenshots.
- Game released
- Java
- 1.21.6 · Stable
- Bedrock
- 1.21.90 · Stable
Focus Happy ghast flight, building platforms, mob transport, saddles and the Player Locator Bar
Topic Chase the Skies
Install Included in the official game update
Vibrant Visuals requires a supported Bedrock device.
Java + Bedrock · Release
Chase the Skies: Fly, Build and Travel Together
Raise a happy ghast, turn it into a flying building platform and carry friends or mobs across your world. A practical Chase the Skies guide for Java 1.21.6 and Bedrock 1.21.90, with recipes, flight tips and original Mojang screenshots.
Vibrant Visuals requires a supported Bedrock device.
- Update type
- Major release
- Release channel
- Java & Bedrock
- Official release date
- 2025-06-17
- World safety
- Back up before updating
- Player impact
- Happy ghast flight, building platforms, mob transport, saddles and the Player Locator Bar
- Platform family
- Cross-edition
- Supported devices
- Java on Windows, macOS and Linux; Bedrock on supported mobile, console and Windows devices
- Install format
- Official game update
- Touch readiness
- Check guide
- Resource type
- Update
- Last verified at
- Sep 16, 2026
- Update state
- historical
- Compatibility confidence
- Source claimed
- Bedrock version/build
- 1.21.90
- Card delivery statement
- Included in the official game update
- Card limitation note
- Vibrant Visuals requires a supported Bedrock device.
- Edition applicability
- Java + Bedrock
- Java version/build
- 1.21.6
- Shared update topic
- Chase the Skies
- Delivery state
- No file
- Lifecycle state
- Superseded
- Java update channel
- Stable
- Bedrock update channel
- Stable
Player discussion 0
Questions, discoveries and help from other players.